I just LOVE easy mechanical paper crafts! It’s nice when something is pretty and all, but if it moves or does something, I have a blast. Yesterday I made a self-walking pair of feet and today, I am making walking horses! Well, they don’t actually look like horses but let’s say they’re four legged animals. Anyways. I digress.
I found a little video of this craft a while ago and thought it looked like so much fun that I had to try it out. Never really had the time to do so until now. The video I saw made it look way easier to make the animals walk, but once I figured it out, I cannot stop playing around with it!
So if you are bored and/or looking for fun stuff to do with your kids, here is the tutorial.

material

You really don’t need much to make this craft:
A sheet of paper
Scissors
A pencil
A ruler
That’s it!
instructions

With the pencil and the ruler, draw a grid on the sheet of paper. There must be 3 columns, 5 cm wide each, and the column on the left as well as the one on the right must have 3 lines of 1.5 cm of height. On each top and bottom corner, draw a mark 0.3 cm away from the border, and draw a line from that mark to the corner right above or below it. You must see a little triangle on each corner as a result.

Cut the outline of the grid.
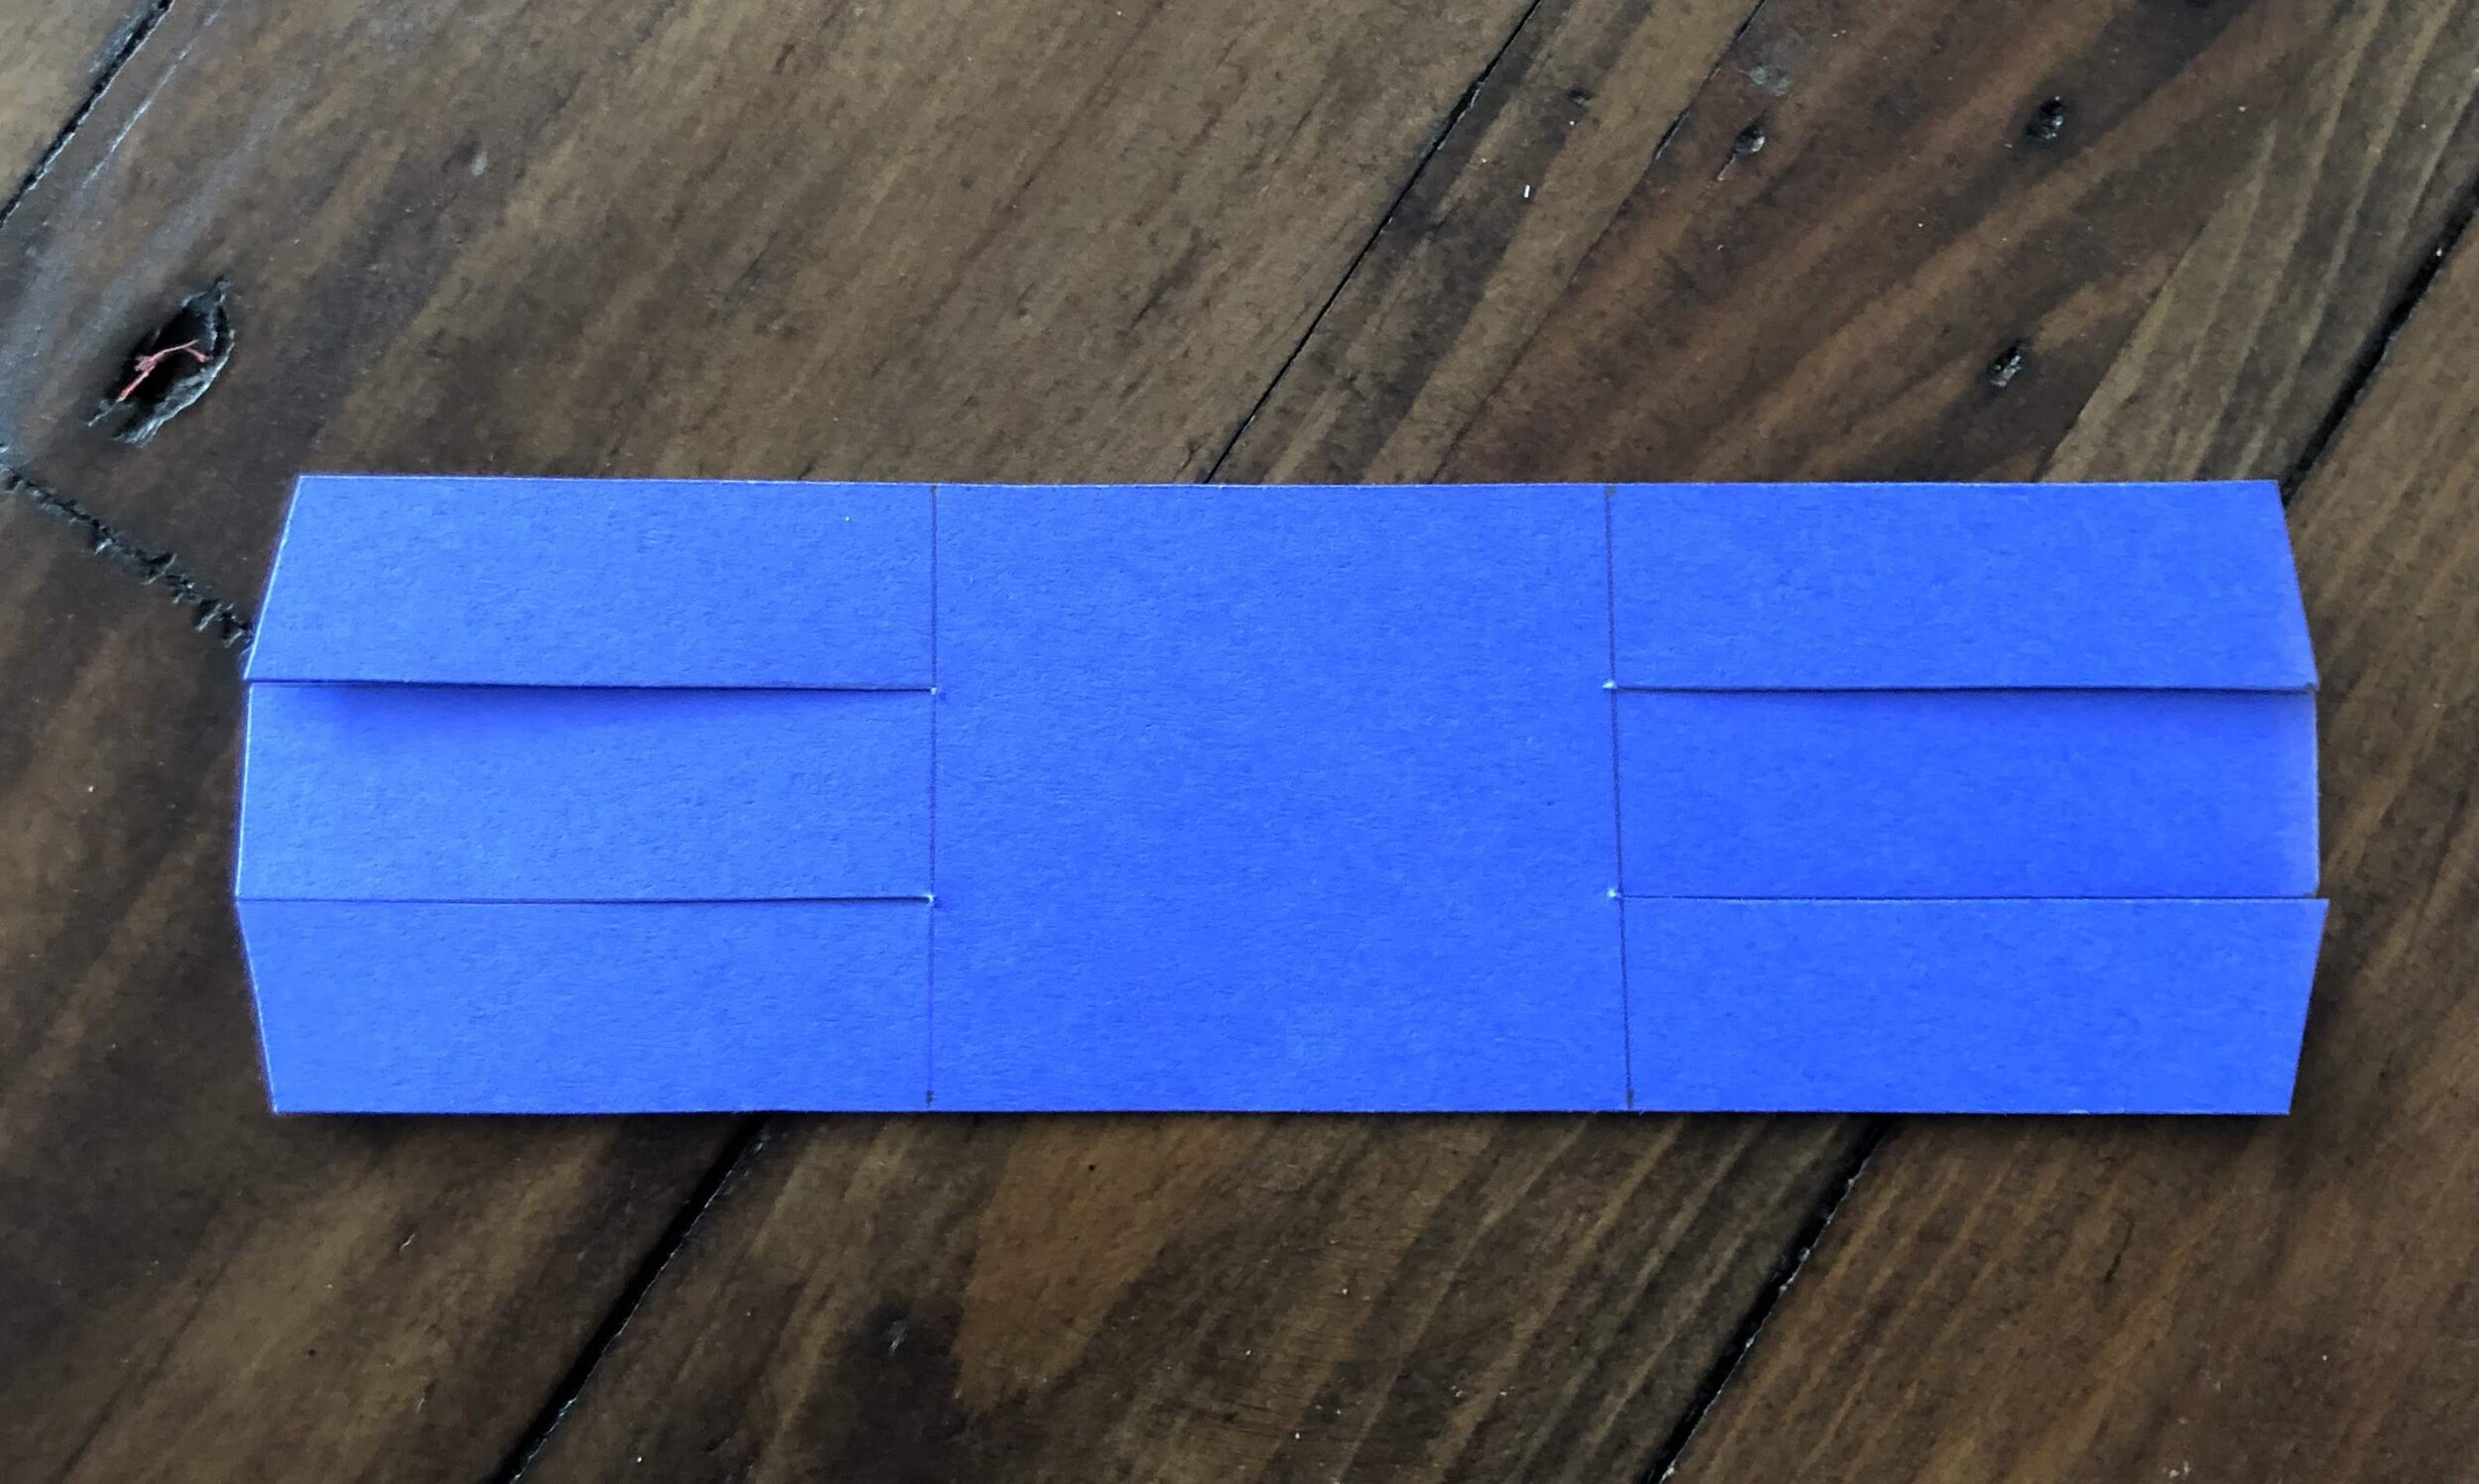
Then cut out the tiny little triangle on each corner, and cut along the horizontal lines.

Now fold the top right leg along the vertical line, and do so for the 2 legs at the very left and right bottom and the other upper leg.
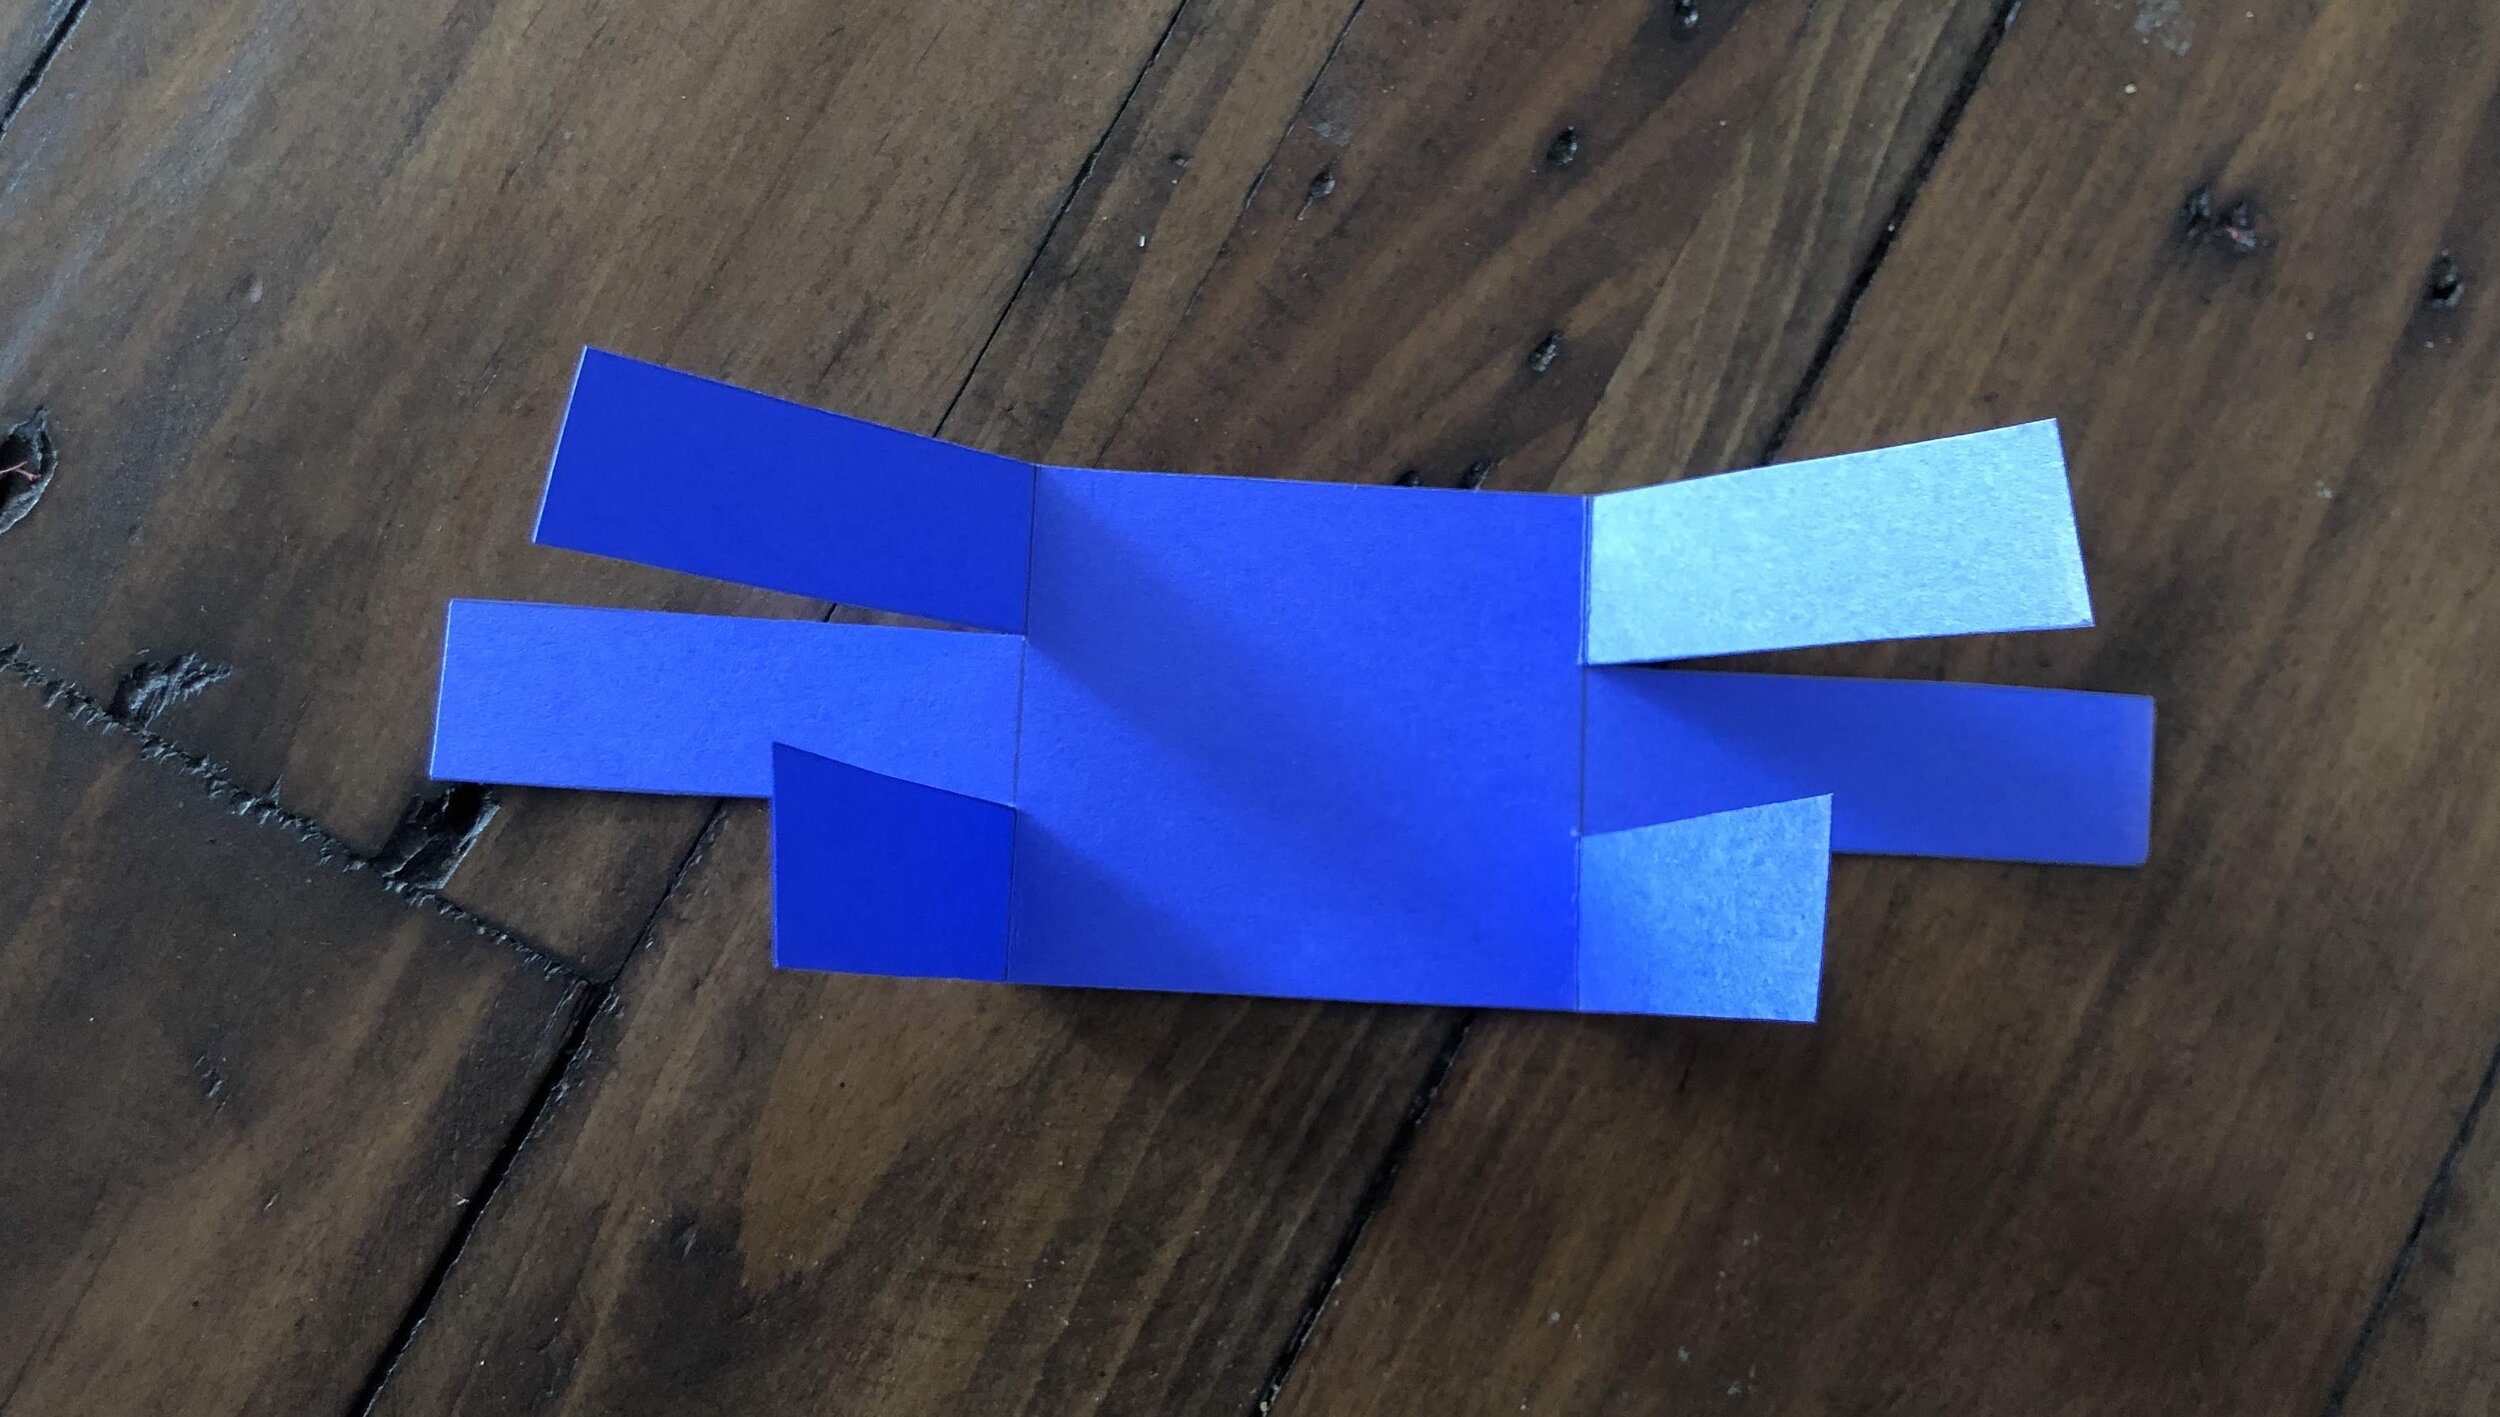
This is the result you should get.

Now fold the 2 middle parts in the opposite direction, to obtain the above result. See? Now you have four legs, a tail and a head!

Give more shape to your animal’s tail by rolling it, of twisting it.

For the head, fold the extremity a bit.
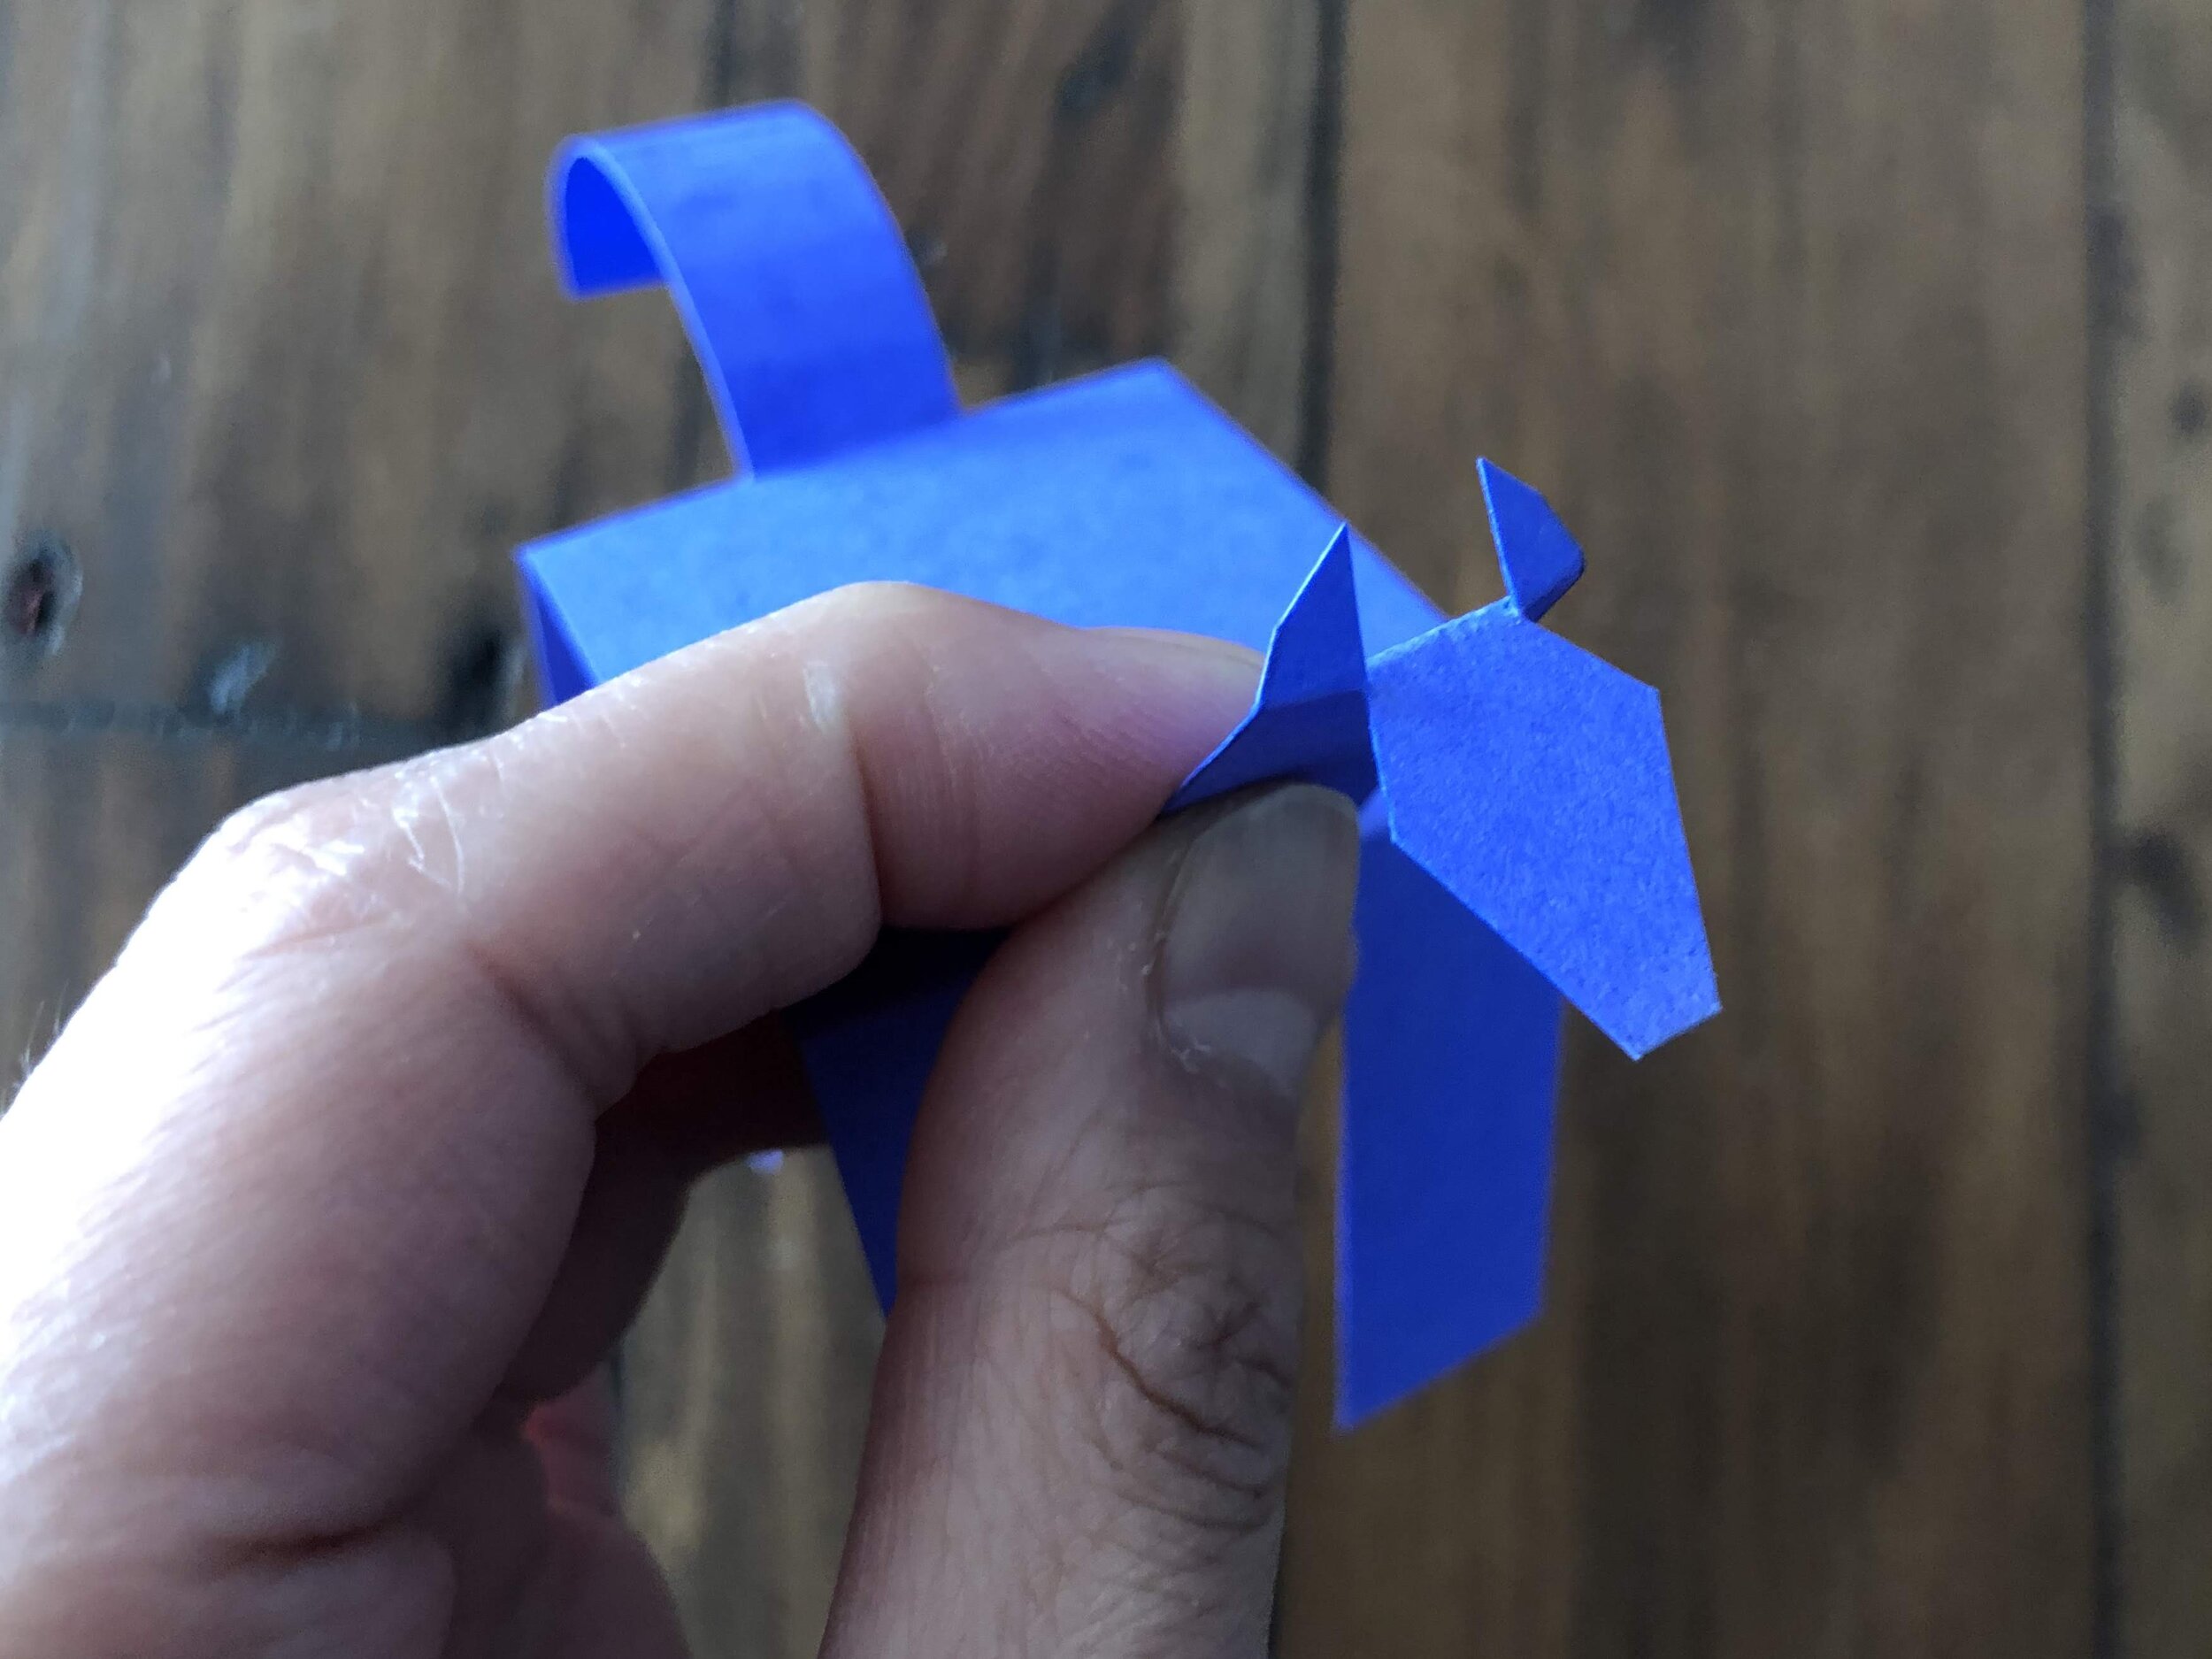
Decorate the head as you wish. I simply cut out ears but you could draw eyes, and a nose.

And that’s it! Your animal is ready to go for a walk!
On a flat surface, nothing will happen. You must put your animal on a slanted surface, give it a little tilt and watch it walk down the hill!
I must say that this last step requires a little practice. It took me some time to figure out the perfect angle for my horse, and the appropriate force with which I must tilt and push the animal for it to start walking and not just fall on the side. Sometimes, they will stop walking mid-way and will need your help to continue walking.
Nonetheless, once I got all that figured out, I had a blast!
Check out my Instagram and/or Facebook accounts to watch a little video of my horse walking down a cardboard hill!
Until next time, have fun!