Strawberry/ coconut pops

This summer is about to get really hot, humid and sticky. Actually, it already has but my guess is that it’s about to get worse. I’m a dessert person and it is inconceivable for me not to eat something sweet after a meal. That being said, I do not have air conditioning in my kitchen and the very idea of turning my oven on in this crushing heat is giving me hives.

This summer, I will probably just focus on no-bake desserts and ice creams. I know that this section of the blog is called “Baking” and I probably should have called it “Desserts” for more coherence but I didn’t. I created the blog in the dead of winter, at a time when all I could think about was delicious, hot, freshly baked little cakes. I probably should change the name but chances are that I won’t.

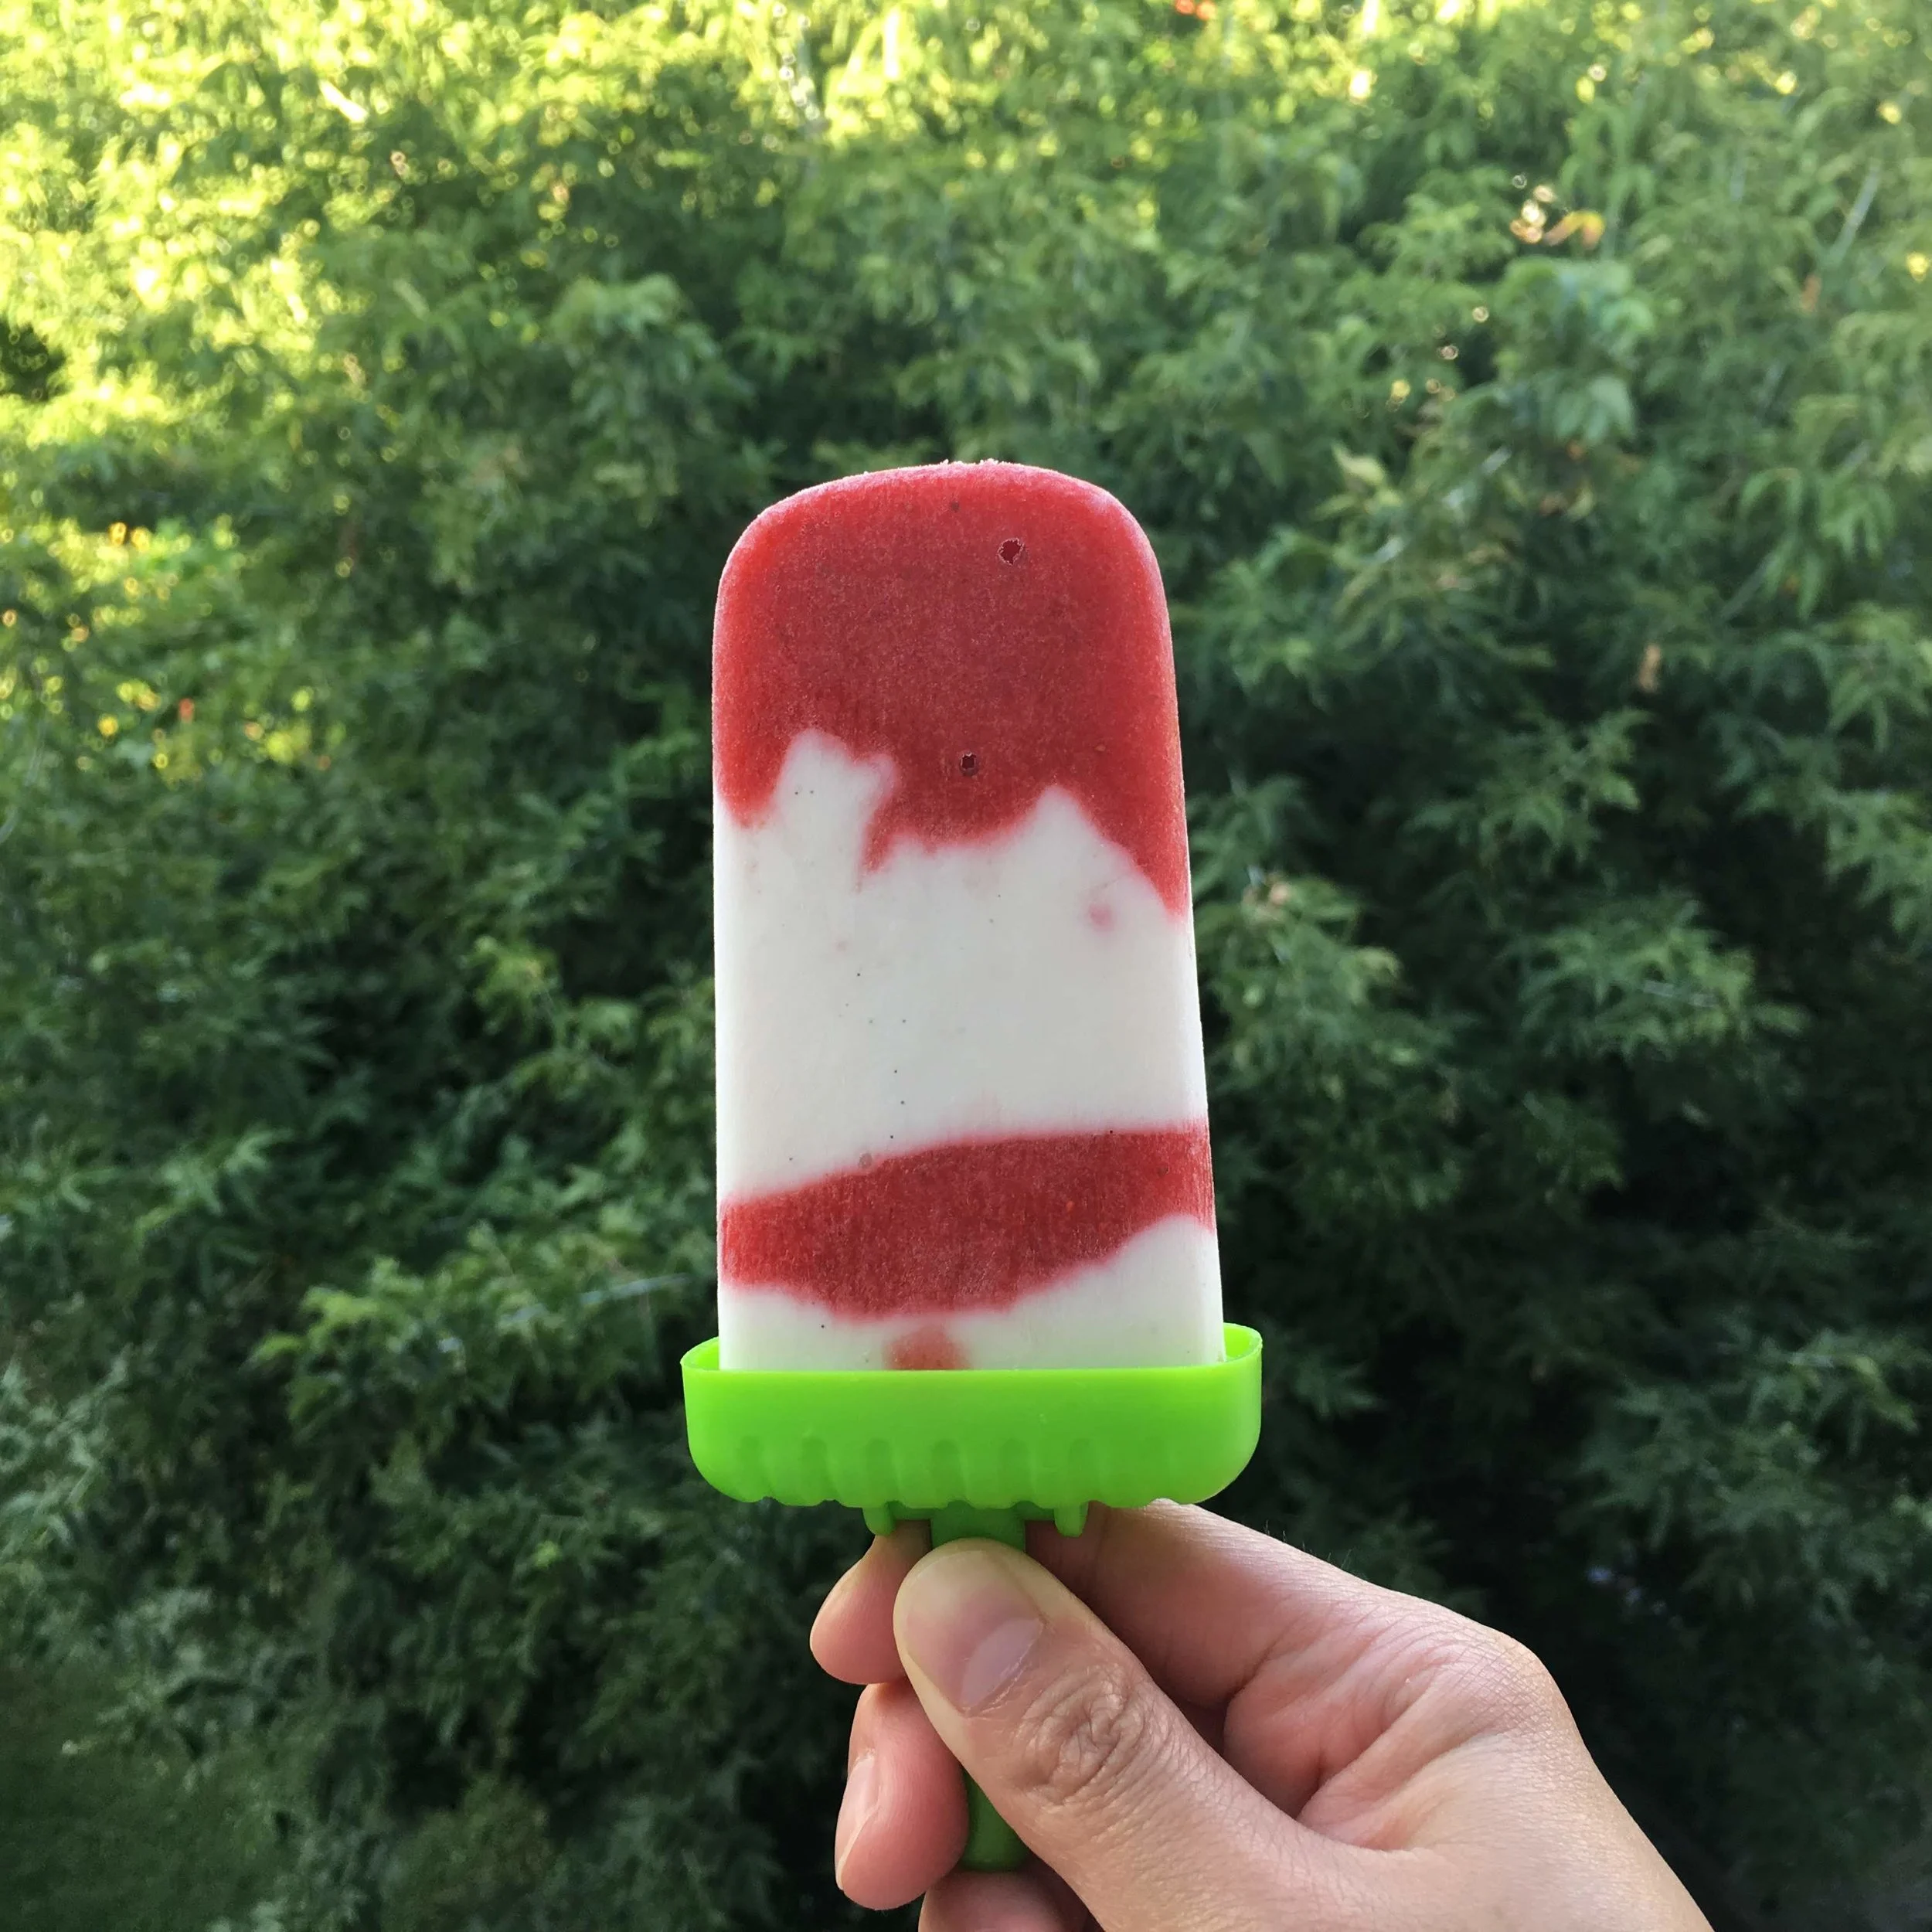
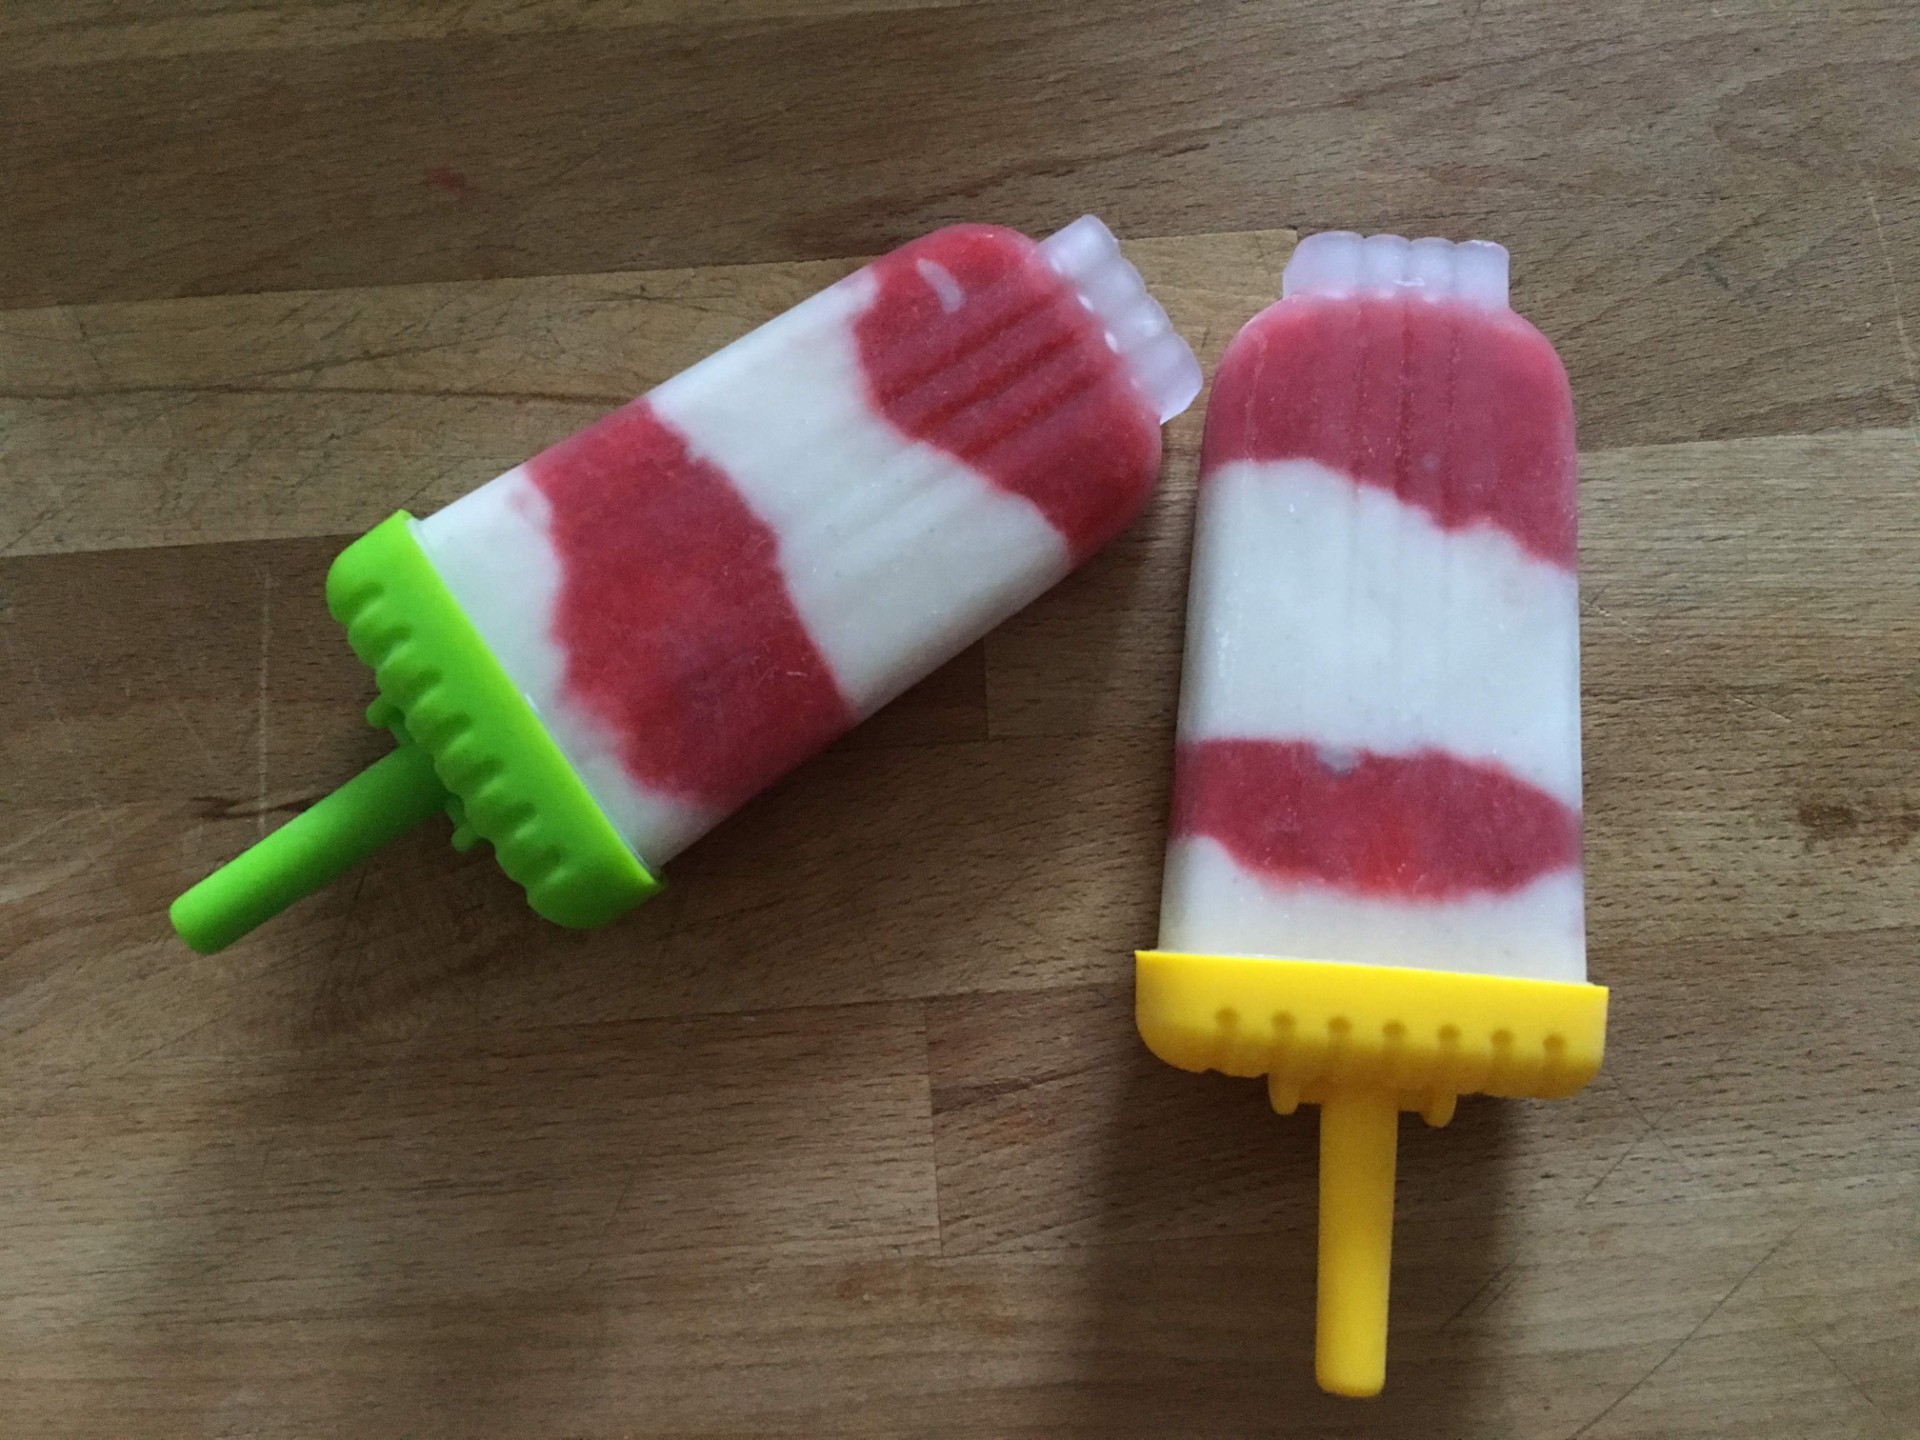
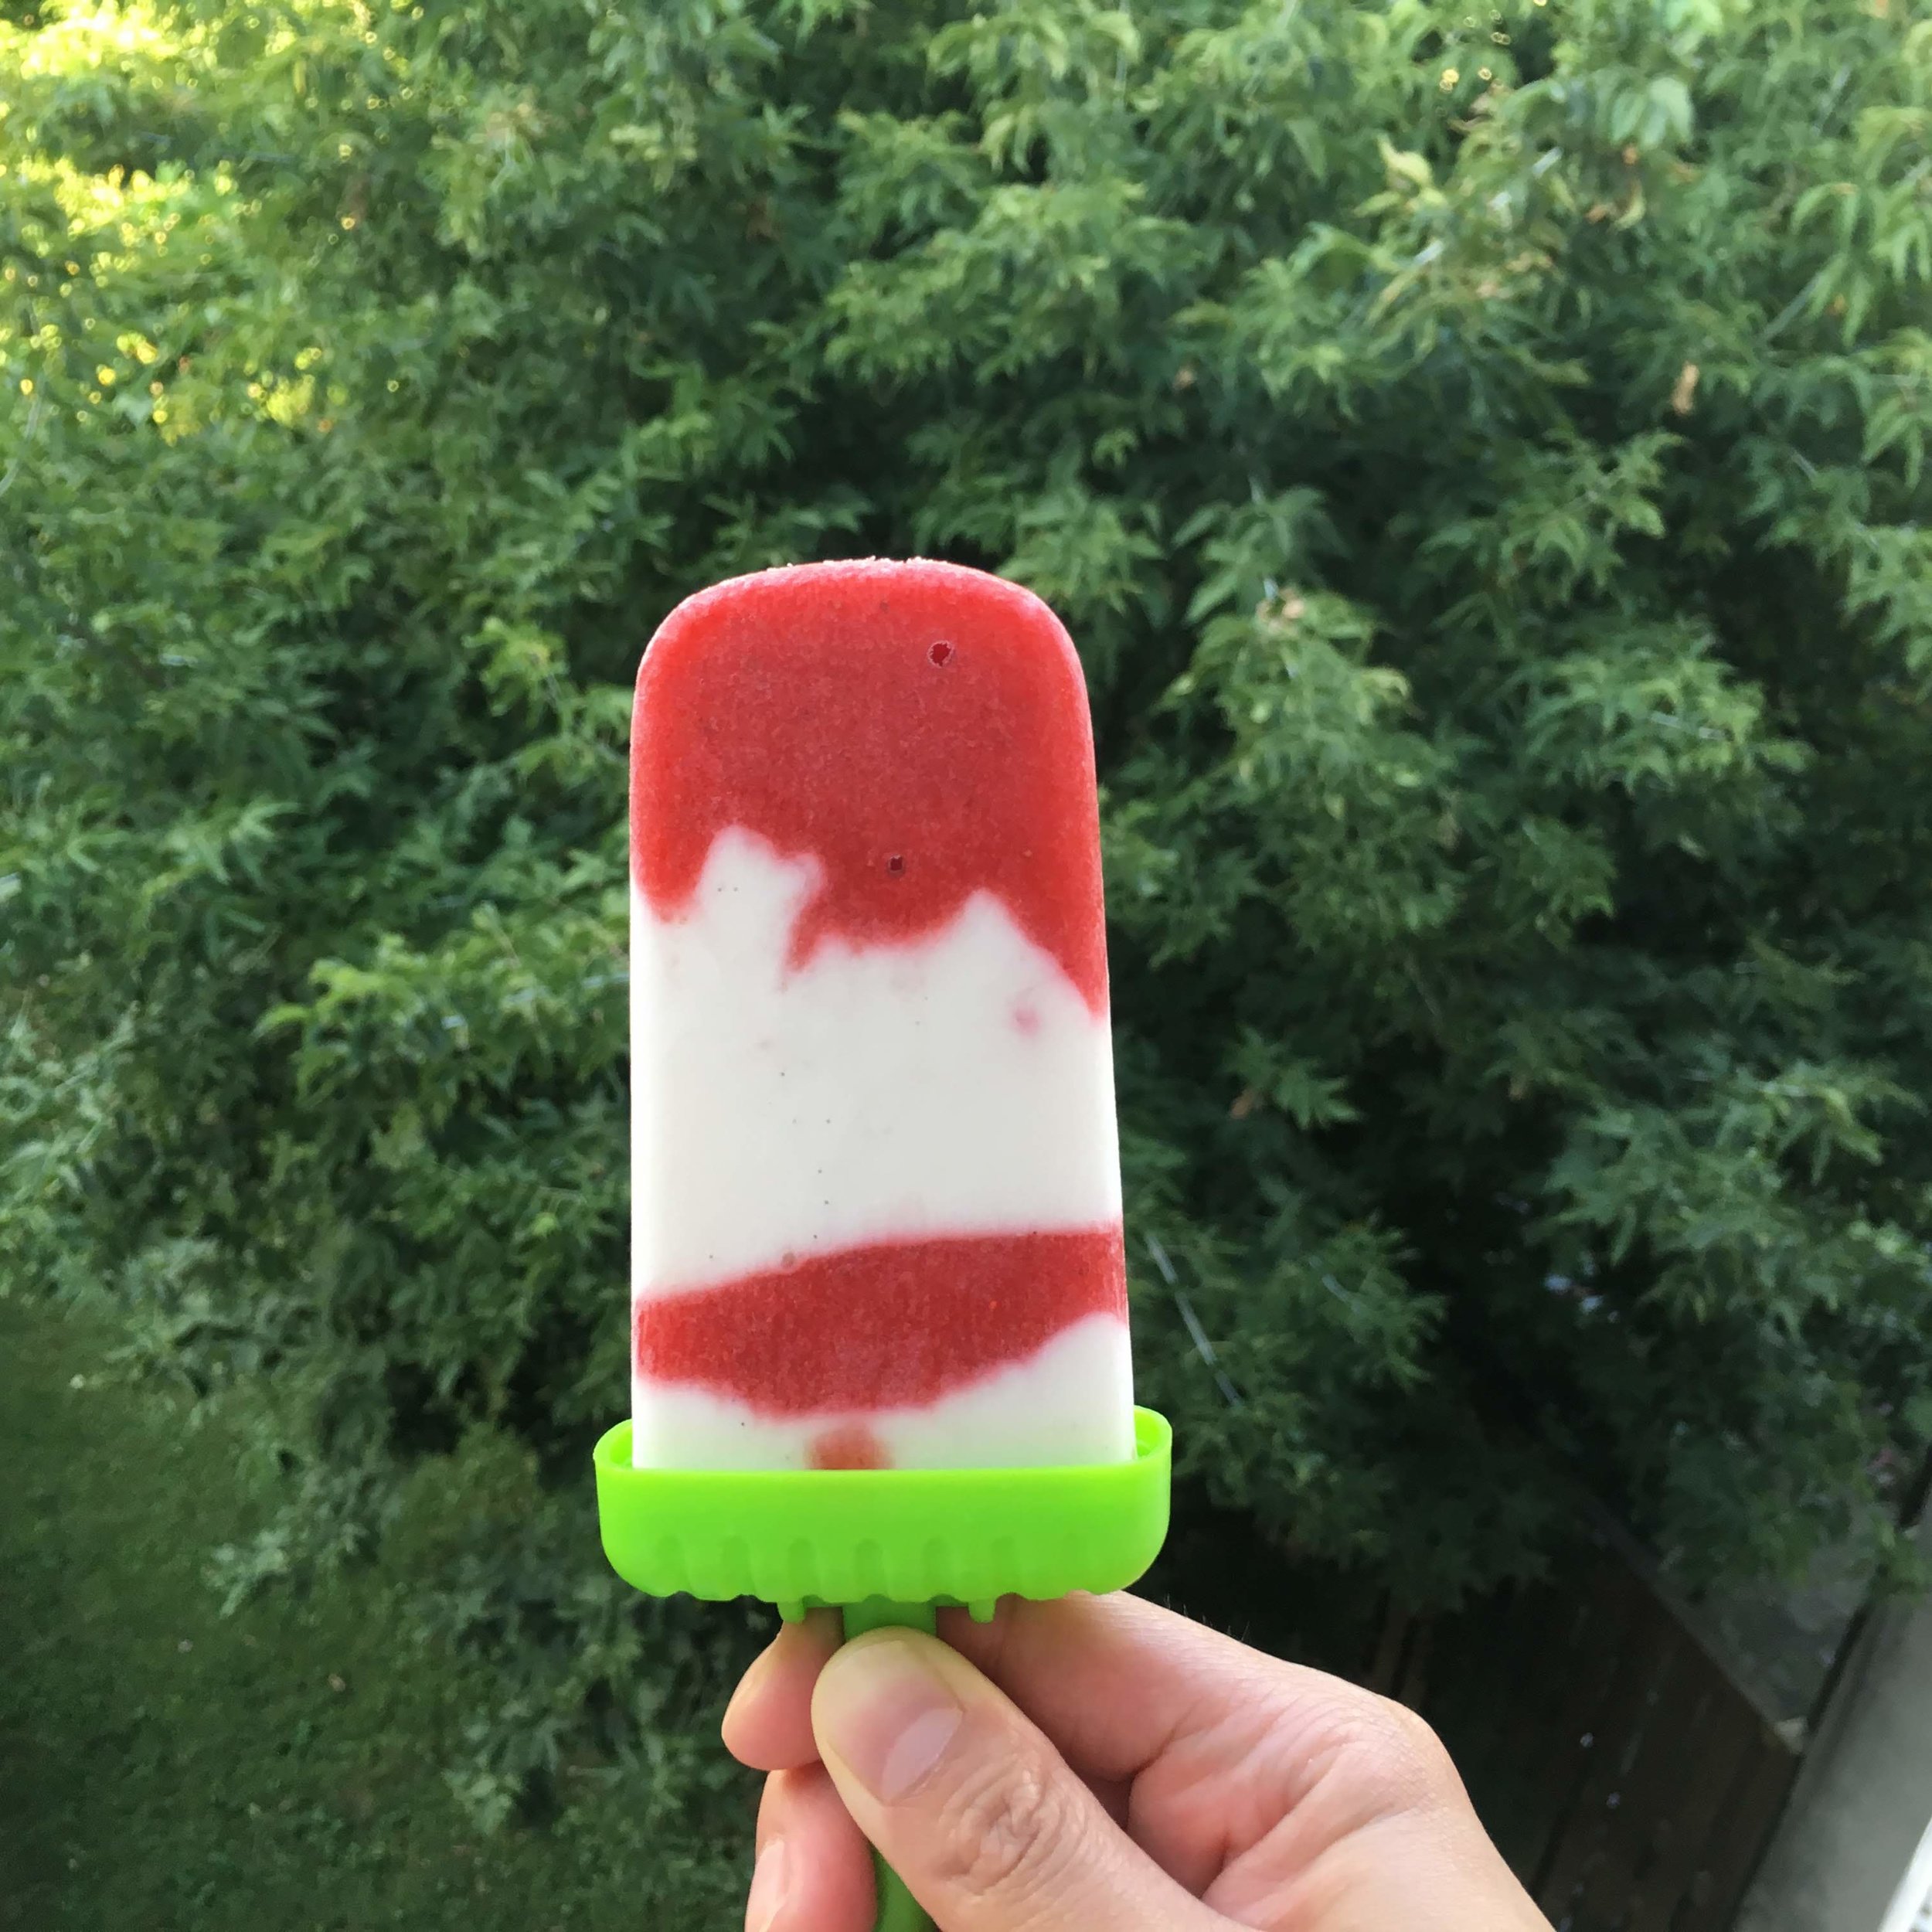
Anyways, on hot summer days like this one, I really like to lazily sit around in the shade while enjoying a cold fruity pop. Since it’s strawberry season, I made a batch of fun and refreshing strawberry/ coconut pops! What’s great about them, aside from being cold and tasty, is that they are super easy to make. The hard part is waiting for them to freeze before being able to enjoy them…

IMG_8553.jpg

Strawberry / coconut pops

Makes about 10 pops

ingredients

  • 1 can coconut milk

  • 1 tsp vanilla bean paste

  • 2 tbsp + 1/4 cup honey

  • 1.5 cups fresh or frozen strawberries

directions

  1. Mix together the coconut milk, vanilla bean paste and 2 tbsp honey. Set aside.

  2. Put strawberries and 1/4 cup honey in a blender and blend until pureed. Add more honey and mix if not sweet enough.

  3. Pour some coconut mix into the popsicle molds. Place in the freezer for a few minutes, and pour some of the strawberry mixture on top. Continue alternating coconut and strawberry mixtures until reaching the top of the molds, freezing a little bit after each pour for a detailed layering. Then, insert popsicle sticks and freeze for a few hours, until firm.

  4. If you are not that into the layered look or if you prefer not to separate the coconut from the strawberry flavor, you could simply combine the 2 mixtures beforehand and then pour the whole thing into the molds. Freeze for a few hours until firm.

And that’s it! How easy was that? I opted for the layered pops which provided a soft, creamy, coconutty ice cream, alternating with the vibrant, fresh and juicy strawberry flavor, but I must admit that combining the two mixtures offers a fuller, more complete gustatory experience. The coconut milk, by it self, could get a bit overwhelming after a while. Blending the two mixtures together before freezing creates more balanced pops. It all depends on your taste, really.

For the molds, if you are wondering, I used these amazing reusable molds that come with a tray and their own case. Makes it way easier to pour, freeze and store, but most importantly, they help me keep my workstation clean (I tend to be a bit messy and clumsy…)! These molds are quite affordable so I bought 2 sets of 6.

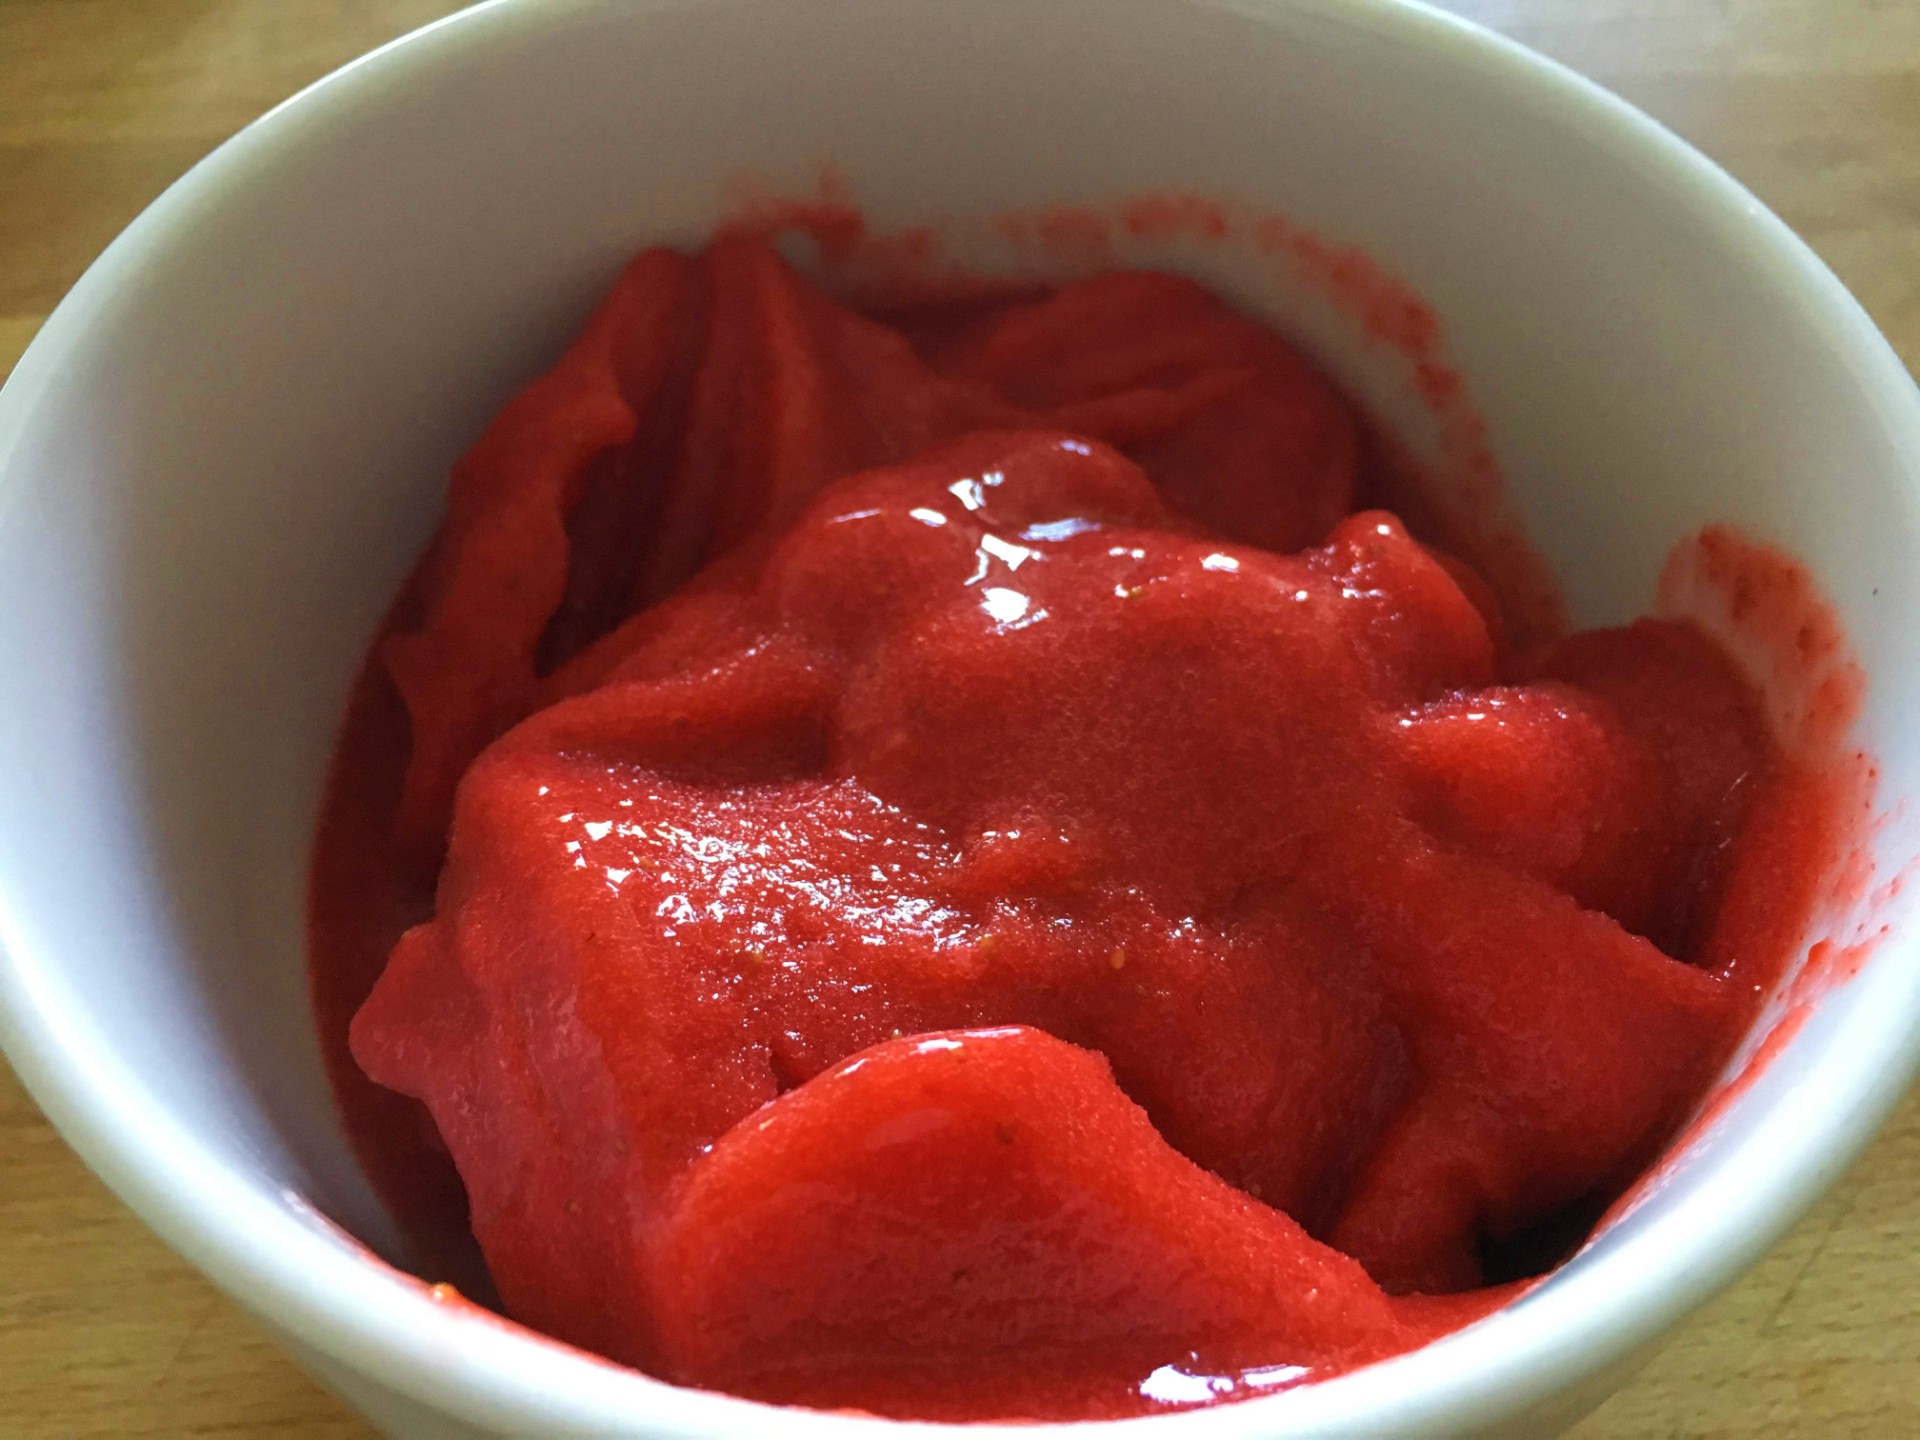
I used strawberries here because they’re in season but you could pretty much go for any fruit. Pick your favorite (any berries, peach, mango, you name it!), puree it and freeze it. The coconut milk adds creaminess but if you do not like it, use vanilla cream or no cream at all!

Add little chunks of fruits inside as well for some texture! The possibilities are pretty much endless.

Enjoy and stay cool!

Black sesame seed ice cream

This dreadful and seemingly endless winter we’ve had this year is over and ice cream season has finally come! Ice cream is undoubtedly my favorite dessert because it’s got everything to make life better: it’s sweet, cold, refreshing and comes in so many different flavors and textures that we can never get bored!

That being said, we often times have to search for special flavors. Stores always sell the same old traditional flavors while parlors that actually make original flavors are rare and usually not that accessible. That’s why, a few summers ago, I decided to invest in my very own ice cream machine. I can now make any ice cream I want, whenever I want! Truth be told, making a proper good ice cream is not that easy and requires some patience, which I do not have when in the midst of a serious craving. But I still consider a 45 minute commute and waiting in line behind a bunch of undecided people who cannot make up their mind already, the worst of all possible options.

Anyways, after having made regular ice creams like vanilla or pistachio, I decided to tackle something different: black sesame seeds. I love sesame seeds. They add so much flavor, depth and texture to meals, it’s incredible. Though black sesame seeds pretty much taste the same as the white ones, their color is the reason why I chose them over white sesame. I wanted something different, something that would stand out.

Not only is the result eye catching, but it’s also delicious! The taste is incredible, the ice cream is unctuous and the little sprinkle of toasted black sesame seeds on top adds a very welcome crunch. Amazing!

IMG_8913.jpg

ingredients

Black sesame paste

  • 1/2 cup black sesame seeds

  • 1 tbsp honey

Ice cream

  • Black sesame paste

  • 1.5 cup milk

  • 3/4 cup sugar

  • 1/4 tsp salt

  • 4 egg yolks

  • 1.5 cup cold heavy cream

  • 1 tsp vanilla extract

Topping (optional)

  • 2 tbsp black sesame seeds

  • 1/8 tsp salt

directions

  1. Roast the black sesame seeds in a pan over medium heat. Set aside fora few minutes to cool.

  2. Grind the sesame seeds in a food processor. When a paste starts to form, add the honey. Continue grinding to mix the ingredients together and until the mixture attains a paste-like consistency. The whole mixture must be able to hold together.

  3. In a bowl, vigorously whisk egg yolks. Set aside.

  4. In a pot over medium heat, mix together milk, sugar, sesame paste and salt, stirring regularly until the sugar dissolves.

  5. With a ladle, add the warm milk mixture to the egg yolks, one spoonful at a time, whisking constantly so the eggs don’t curdle. Mix until incorporated.

  6. Return the mixture to the pan and heat over medium heat. Stir constantly until the mixture thickens and coats the back of a spoon. If you can draw a line on the back of the spoon, you can stop stirring.

  7. Pour the cold heavy cream in a bowl and pour the milk mixture in it as well. Add vanilla extract and mix until combined.

  8. Cover the surface with a plastic wrap and put the bowl in the fridge for at least 4 hours, but preferably overnight.

  9. Make the ice cream in the ice cream machine, according to the manufacturer’s instructions.

  10. Transfer the ice cream to a freezer-safe container, cover and freeze until firm.

  11. In the meantime, prepare the topping by roasting the remaining sesame seeds with the salt. Transfer into a bowl and set aside to cool.

IMG_8912.jpg

Before scooping, let the ice cream rest a bit at room temperature, as it tends to harden a bit in the freezer. Once scooped, top it with a bit of salty roasted sesame seeds, or with the topping of your choice.

If you’re looking for a different flavor, this one is definitely it. The flavor is rich and dense, but quite indescribable. I must admit that it is not for everyone but it absolutely deserves a try!


Easy and versatile chocolate cake

Chocolate cake is the ultimate comfort food, next to ice cream. Feeling down? There’s nothing better to drown your sorrows in than one of those two desserts. Even better, eat a chocolate cake with a scoop of ice cream on top! But I digress.

I have 2 chocolate cake recipes in my arsenal and they are both awesome and super easy to prepare, which is perfect because they allow me to rapidly whip up a dessert in no time, in case of emergency (surprise guests, a birthday I forgot about, or simply because I want to eat something chocolaty). The first recipe is Ina Garten’s Beatty chocolate cake, and like all of Ina Garten’s recipes, it’s strait forward, no-fail and fabulous! My other recipe is coconut milk-based. Though I adore Ina Garten’s chocolate cake, the coconut milk recipe is the one I go back to the most. It depends on what you feel like. If you prefer fluffy and moist chocolate cakes, go for Beatty’s. If you crave something a bit more dense, go for that coconut milk cake. Since I have a preference for denser cakes, I tend to lean towards the second recipe. It’s also very versatile so it allows me to make lots of variations of chocolaty desserts.

IMG_4832-cropped.jpg

Easy and versatile chocolate cake

Makes approx. 12-16 muffin-size cakes or lots of mini cakes

ingredients

  • 2 oz dark or semi sweet chocolate, finely chopped

  • 3/4 cup unsweetened cocoa powder

  • 3/4 cup boiling water

  • 6 tbsp butter, melted

  • 3/4 cup sugar

  • 2 eggs

  • 1 cup coconut milk

  • 1 1/4 cups all-purpose flour

  • 1 tsp baking soda

  • 1/2 tsp baking powder

  • 1/2 tsp salt

  • 1/4 tsp almond extract

  • Optional: 1/2 cup unsweetened coconut flakes, chocolate chips and/or nuts

directions

  1. Preheat oven to 350 degrees.

  2. Butter muffin pan or line with paper liners.

  3. Put chocolate and cocoa powder in a bowl and pour boiling water on top. Let the mixture stand a while, only stirring occasionally. Continue stirring every now and then until the chocolate has melted and the mixture is smooth.

  4. In another bowl, sift together flour, baking soda, baking powder and salt.

  5. In the bowl of an electric mixer with the paddle attachment on, beat butter and sugar until combined, about 2-3 minutes.

  6. Add eggs one at a time, mixing well after each addition.

  7. Add chocolate mixture and mix well, about 2 minutes.

  8. Add the flour and the coconut milk to the mixture in alternative steps, starting and ending with the flour. Mix until just combined.

  9. If you want to add coconut flakes, chocolates chips and/or nuts, fold them in.

  10. Pour batter into prepared pan.

  11. Bake for approximately 18-20 minutes, or until a toothpick inserted in the center comes out clean.

  12. Remove the pan from the oven and let it cool down. Then, carefully remove the cakes from the pan and transfer them on a wire rack so they cool completely.

For the frosting, I almost always opt for chocolate mousse. I have a great recipe that I always use and you can find it here. I find the airy dark chocolate mousse pairs very well with the fudgy and coconutty chocolate cake.

Variations

This chocolate cake is the base for a lot of my other chocolaty desserts: I use it for muffins, loaf cakes and more! It’s so versatile, that you get a whole different dessert with one or two minor changes! How awesome is that?

Chocolate banana bran muffin: I used the coconut milk chocolate cake recipe, added nuts, ripe bananas, 1 cup of rolled oats. Dusted sugar on top of the mixture before putting it in the oven, for a caramelized crunch.

Chocolate banana bran muffin: I used the coconut milk chocolate cake recipe, added nuts, ripe bananas, 1 cup of rolled oats. Dusted sugar on top of the mixture before putting it in the oven, for a caramelized crunch.

Chocolate loaf cake: basically the above recipe but baked in a loaf pan, with chocolate chips inside and on top.

Chocolate loaf cake: basically the above recipe but baked in a loaf pan, with chocolate chips inside and on top.

The “Bounty” cake: the above recipe but with a coconut macaroon center, just like the chocolate bar. Simple chocolate glaze on top to make it more decadent!

The “Bounty” cake: the above recipe but with a coconut macaroon center, just like the chocolate bar. Simple chocolate glaze on top to make it more decadent!

I sometimes like to put vanilla frosting on my chocolate cake. My favorite vanilla frosting recipe is made with cream cheese and I find its tartness fits extremely well with the chocolate flavor.

IMG_1393.JPG

You can simply add ingredients to the chocolate cake mixture and you can get a whole different dessert. So mix it up and have fun!

Enjoy!

My go-to chocolate frosting that's actually chocolate mousse

I tried to find a good alternative to buttercream frosting. For vanilla cakes, I have a fantastic cream cheese frosting that I can always depend on because it’s pretty much foolproof. But for chocolate cakes, I searched long and hard to find a great yet easy frosting recipe that is not buttercream or even worse, meringue buttercream. Don’t get me wrong, buttercream or meringue buttercream taste amazing and are a dream to pipe. That being said, they are way too sweet for my taste and my kitchen’s room temperature is just too unstable for a proper result. You see, if the room is too cold, the butter will harden and there will be no cream in your buttercream; just sweet, thick butter. If it’s too hot, the butter will melt too fast and the buttercream will curdle. My kitchen constantly fluctuates between too hot and too cold, which means that I always have to MacGyver my buttercream. When the kitchen’s too cold, I have to mix with a hair dryer aimed directly at the bowl. When it’s too hot, I have to mix, refrigerate, and mix again. Meringue buttercream requires a candy thermometer and I just refuse to go there. Candy thermometer requires a level of attention and precision that I’m just not willing to provide.

Then one day it dawned on me that frosting can be what ever we choose it to be. I have a great chocolate mousse recipe so why not use it as frosting? From that day on, whenever I make a chocolate cake, I use chocolate mousse as my go-to frosting. So far, it’s been a huge hit! And why shouldn’t it be? It’s chocolaty, light, not too sweet, airy yet thick enough to be very easily piped. Oh, and did I mention how easy it is to prepare this mousse frosting?

IMG_4830.JPG

My go-to chocolate frosting that’s actually chocolate mousse


ingredients

  • 1 1/2 cups heavy whipping cream

  • 4 large eggs, room temperature

  • 2 tbsp powdered sugar

  • 12 oz good dark chocolate

  • 1/4 unsalted butter, cubed

directions

  1. Whip the cream until firm and forms peaks. Set aside in the refrigerator.

  2. Whip eggs and sugar at medium/high speed until fluffy and thick, about 10 minutes.

  3. Melt the chocolate in the microwave (heat 30 seconds at a time, mix and heat again, to prevent the chocolate from burning).

  4. Mix butter in the chocolate until it’s all melted and the mixture is smooth.

  5. Add the chocolate mixture to the egg mixture and stir the whole thing by hand with a rubber spatula until fully incorporated.

  6. Fold in the chilled whipped cream. Continue folding until fully incorporated.

  7. Pipe on cake.

And voilà! How easy was that? Needless to say that for a better chocolate mousse, you must use the best possible chocolate. That being said, I regularly use the dark chocolate bars from the baking section of my supermarket and the result was just as great.

Enjoy!

Raspberry / Almond / Pistachio Friands

I haven’t baked much lately. There was a series of heat waves during summer, so I avoided turning my oven on at all cost, and then fall came and we took some time off to go on a much deserved vacation to Oahu. After we came back, it took us a while to get back into our regular routine…

However, the holidays are just around the corner and I am feeling energized again! I stumbled on Claire Ptak’s lovely friand recipe in her beautiful book The Violet Bakery Cookbook and had to try it right away. I love friands. They are packed with an intoxicating almond flavor and they are just so moist and delicious, not to forget, pretty easy to make!

If you are pressed for time during the holidays and need to impress with a dessert, these cakes are your solution: they are super tasty, easy and quick to make and the pistachio/raspberry green/red color combo couldn’t be any more christmas-y! Sprinkle a little powdered sugar on top and you’ve hit gold!

I had to adapt the recipe a little bit because I did not have everything on hand, and I did not exactly follow her exact instructions. Bellow is the recipe I made, but for Claire Ptak’s original recipe, check out her book!

IMG_0793.JPG

Raspberry / Almond / Pistachio Friands

Makes approx. 10 muffin size cakes

INGREDIENTS

  • 1/2 cup butter, melted, plus more to grease the mold

  • 5 egg whites

  • 1 tsp vanilla extract

  • 1/4 tsp almond extract

  • 2/3 cup all-purpose flour

  • 3/4 tsp baking powder

  • 1 cup ground almond

  • 1/2 cup ground pistachios

  • 1 cup powdered sugar, plus more to sprinkle the cakes

  • About 30 fresh raspberries

  • 3/4 cup slivered pistachios

DIRECTIONS

  1. Preheat oven at 320 degrees.

  2. Grease the mold of your choice. In this case, I used a regular muffin tin.

  3. Using In the bowl of an electric mixer fitted with the whisk attachment, beat the egg whites until light and fluffy.

  4. Switch to a paddle attachment and add the wet ingredients (melted butter, vanilla and almond extracts). Mix at medium speed until incorporated, about 1 minute.

  5. Add the dry ingredients (flour, baking powder, ground almond and ground pistachio) and mix until incorporated, about 1 or 2 minutes.

  6. Fill the muffin molds about 2/3 full with the batter.

  7. Insert 2 or 3 raspberries into each mold. Be careful not to break the raspberries!

  8. Sprinkle with slivered pistachios. Push them down a bit into the batter so they don’t fall out when the cakes rise.

  9. Bake for 17 to 20 minutes.

  10. Let the cakes rest in the tin for 5 minutes before transferring them to a rack to cool completely.

  11. Sprinkle the cake with some powdered sugar.

That’s it! How easy was that?

IMG_0784.JPG

Don’t like pistachios or raspberries? That’s fine! You can simply replace them with whatever you like: chocolate chips, another fruit like cranberries, nectarines, apple or pear, or another nut like hazelnut. Once you get the base of the recipe, you can pretty much adapt to your taste.

In this case, I find the colors of the cake very festive without being tacky. It’s simple, elegant and delicious!

Enjoy!

Apple crumble cake

Fall is, hopefully, just around the corner! It’s my favorite season: not too cold outside but just cool enough to wear warm cozy clothes, the air feels fresher and the tree leaves change color into a beautiful fiery red. And, most importantly, we can finally go outside and have fun without feeling like we are melting from under the scorching sun. You might have guessed that summer is probably not my favorite time of the year. The heat is too extreme and the sun is way too strong!

I digress. With fall comes apples. Because I hate apple sauce and don’t particularly enjoy most apple pies or apple turnovers, people tend to think that I do not like apples. That is not true. I eat one every day after lunch. It’s crunchy, sweet and tart at the same time. It’s awesome! What I do not enjoy with some apple based dessert is that they take away what makes the apple so great: its crunchiness. I want my apples to still have a bite! Also, there is something with apples that make people go crazy with the cinnamon. Personally, I find the taste of cinnamon to be overwhelming. If you use too much, you will not taste anything else but the cinnamon. Cinnamon is like bananas. If you put too much of it in a recipe, that’s all you’re going to taste afterwards. Then, what’s the point?

But, I digress again… My favorite dessert to bake during fall is the apple crumble cake. That cake is great because you can eat it guilt-free anytime during the day, from breakfast to late-night snack. Like most of my desserts, I prefer to make small individual portions rather than a big one. It’s a question of aesthetics and practicality. Big cakes are only pretty before you cut them. Afterward, they turn into a crumbling mess. Also, they take forever to bake. Smaller, individual portions not only stay pretty but also guaranty that everybody get an equal amount. So no jealousy.

apple cake.jpeg

It took a while to find the perfect recipe for my taste; I had to mix a few recipes together and, after a few trials and error, this one is my favorite so far.

apple cake top.jpeg

Apple crumble cake

Makes 8 rectangular mini cakes or 14 to 16 muffin-size cakes

INGREDIENTS

Crumble

  • 1/3 cup packed brown sugar

  • 1 tbsp granulated sugar

  • 1/8 tsp ground cinnamon

  • 1/4 cup unsalted butter, melted

  • 2/3 cup all-purpose flour

Cake

  • 1/2 cup unsalted butter, softened to room temperature

  • 1/2 cup brown sugar

  • 1/4 cup granulated sugar

  • 2 large eggs, room temperature

  • 1/2 cup plain Greek yogurt (or sour cream) room temperature

  • 2 tsp vanilla extract

  • 1 3/4 cups all-purpose flour

  • 1 tsp baking soda

  • 1 tsp baking powder

  • 1/2 tsp salt

  • 1/4 cup whole milk, room temperature

  • 1/2 cup roasted pecans, chopped

  • 2 green apples, peeled and cubed

  • 1/2 a lemon

DIRECTIONS

  1. Preheat the oven at 350 degrees.

  2. Grease the tin of your choice (mine makes 8 individual 9 x 6 x 3.5 cm rectangular cakes) and coat it with granulated sugar.

  3. Start by making the crumble: in a bowl, combine the sugars, cinnamon and melted butter. Then stir in the flour, using a fork. Mix until all the ingredient are incorporated. The crumble will be dry and thick, and if big chunks are forming, good! They’re the best! Set the bowl aside.

  4. Peel the apples and chop them into cubes. Most recipes will ask you to make sure that all the cubes are the same size. That allows you to make sure that all the apple pieces will bake equally. However, I don’t care for that. I just peel and cut the apples up. If the cubes are not the same size, what you will get is more texture! Some apple pieces will be softer while others will keep their crunch. Drizzle the juice of half a lemon over the apples and mix thoroughly so they don’t turn brown while you prepare the rest of the cake. Set aside.

  5. Using the paddle attachment, beat the butter and both sugars with a stand mixer, at medium-high speed until smooth, 3 to 4 minutes.

  6. Scrape down the sides and add the eggs one at the time. Beat well after each addition.

  7. Add the vanilla extract and yogurt. Beat at medium-high speed until incorporated, 2 minutes.

  8. In a separate bowl, sift together the flour, baking soda, baking powder and salt.

  9. Add the flour and the milk to the mixture in alternative steps, starting with the flour. Mix until just combined.

  10. Gently fold in the apples and the pecans.

  11. Pour the batter into the prepared pan.

  12. Spoon the crumble on top of the batter and slightly press it down into the batter with your hands. This step is important because it prevents the crumble from falling out of the cake while it bakes.

  13. Bake until golden brown, or until a toothpick inserted in the center comes out clean, about 20 minutes.

  14. Remove the pan from the oven and let it cool down. Then, carefully remove the cakes from the pan and transfer them on a wire rack so they cool completely.

Look at that crumble on top! Doesn’t it look delicious? The big chunks are the best!

Look at that crumble on top! Doesn’t it look delicious? The big chunks are the best!

VARIATIONS

If you enjoy the taste of cinnamon, you could add more to the crumble and add a teaspoon into the batter mixture (or more to taste). What you could also do is, in step 2, mix some cinnamon with the granulated sugar and use that mixture to coat the pan!

If you want to add a little something to your cake, caramel sauce or a simple vanilla glaze (confectioners' sugar mixed with cream and vanilla extract) will do the trick. But if you’re tired or feel lazy, go for a generous scoop of good vanilla ice cream!


Enjoy!


Vietnamese coffee ice cream

My childhood memories are mostly food related. Tastes and smells often trigger something deep in my mind, taking me back in time. My fondest memory revolved around my father and his ice coffees. Every day during summertime, he would make himself one and, if I'm good, he'd make one for me too. Didn't matter how young I was, didn't matter that I wasn't even old enough to go to school yet, I was already drinking coffee! These sort of things never bothered my parents, and or that, I'm grateful! 

My father usually made a simple instant coffee with ice cubes. He'd make his black and he would put some sugar in mine. But, when he's in a good mood or when he feels fancier, he'd go to the store and buy a can of condensed milk. I loved these cans! Still do! What is he doing with the condensed milk? Well, Vietnamese ice coffee, of course! Also known as cà phê đá (cà phê = coffee and đá = ice), Vietnamese ice coffee, along with staples such as the Banh mi (Vietnamese sandwich) are the perfect result of the effect of French colonialism on Vietnamese culture. 

There are different variations but typically, you make a Vietnamese coffee by pouring some condensed milk at the bottom of your glass, then pour freshly brewed coffee on top. Add ice cubes, mix the whole thing together and enjoy! On very hot days, my father would substitute the condensed milk for vanilla ice cream, and I'm in heaven! 

My father would make these coffees out of nostalgia. He was homesick and sipping this refreshing cold drink reminded him of home. The other day I was myself also feeling nostalgic and decided to revisit one of my childhood favorites. Anyone who knows me well would tell you that although I love baking, my absolute all-time dessert of choice is ice cream. I worship ice cream! Can't have enough and I would eat them at any time of the year. Who said they were just for summer? Anyways, it was a hot summer day and I realized that I hadn't had a Vietnamese coffee in decades. Even though I started drinking coffee at a very young age, I did not grow up to be a coffee maniac. One cup a day in the morning is enough for me. Since I just bought myself an ice cream machine, I decided to combine my favorite childhood treat with my favorite dessert, and behold, the Vietnamese coffee ice cream!

DSC_0018.jpg

The result was extremely satisfying! It tasted like my early childhood, it was refreshing and the coffee still had a kick (I was concerned all the ice would have diminished its effect).

So, if you're looking to make something different this summer, why don't you give this one a try? Plus, it's super easy to prepare!

DSC_0017.jpg

Vietnamese coffee ice cream

INGREDIENTS

  • 1 1/2 cup of good freshly brewed coffee
  • 2/3 cup sweetened condensed milk
  • 2/3 cup heavy cream

DIRECTIONS

  1. In a bowl, mix together the coffee, condensed milk, and cream until combined. Cover and chill the mixture overnight.
  2. Pour the mixture into an ice cream maker and freeze according to the manufacturer’s instructions.
  3. Transfer the ice cream to a freezer-safe container, cover and freeze until firm.

That's it! How easy was that? I like to sprinkle some ground coffee in the mixture in step 3 because I enjoy the little crunch. If that's not your cup of tea, leave it like that or add a few dark chocolate chips if you like. Even better, melt the chocolate and pour it in the ice cream machine, when the ice cream is almost ready. If your machine does not allow that, pour it in the mixture in step 3 and delicately mix a little bit. The melted chocolate will freeze into fine and delicate strands. The end result would be more refined than just chocolate chips.

Note: If the coffee is too strong for you, use 1 cup of brewed coffee instead of 1 1/2. 

Enjoy!

DSC_0011.jpg

The best carrot cake

A good carrot cake is very difficult to come by. Especially if you, like me, don't like cinnamon. I am not a fan of spices in general and never found the need to add them to my desserts. Personally, I find their taste a bit too strong and overwhelming, and that is why I tend to avoid using them when baking. The problem is, most carrot cake recipes require some amount of cinnamon, spices or raisins. Raisins. That's another thing I dislike. So, although I do love a good carrot cake, I seldom find one I actually enjoy or a recipe for one that doesn't require raisins and cinnamon or some other spice.

IMG_4959.JPG

This recipe is my all-time favorite because it requires none of the ingredients I dislike and it tastes wonderful! I rarely make carrot cakes, though, because the amount of dishes I have to wash afterwards is depressing. So, I save this cake for special occasions and make it only once or twice a year. This year, I baked a batch over the Easter break.

IMG_4943.jpg

If you are not a fan of cinnamon, spices and raisins but love carrot cake, this recipe is definitely for you. 

IMG_4962.jpg

The best carrot cake

Makes 24 muffin size cakes

Ingredients

  • 2 1/2 cups flour

  • 1 1/2 tsp baking soda

  • 1 1/4 tsp baking powder

  • 1/2 tsp salt

  • 1 1/2 cups sugar

  • 4 large eggs, room temperature

  • 1 cup vegetable oil

  • 1 tsp vanilla extract

  • 2 cups grated carrots (approx. 4 carrots)

  • 1 cup chopped pecans

  • 1 cup unsweetened shredded coconut

  • 1 8oz can of crushed pineapple (drained)

  • Vanilla frosting

Directions

  1. Preheat oven to 350 degrees.

  2. Line 2 muffin tins with paper liners.

  3. Sift together flour, baking soda, baking powder and salt.

  4. In the bowl of an electric mixer fitted with the paddle attachment, mix sugar, eggs, oil and vanilla at medium speed until light colored and well combined. 3 to 4 minutes.

  5. Slowly add the flour mixture and mix until just blended.

  6. Fold the carrots into the mixture. This step and the next ones are delicate, so hand mix with a spatula.

  7. Fold the pecans into the mixture.

  8. Do the same for the coconut, and then the pineapple.

  9. Fill each liners about 2/3 full with the batter.

  10. Bake for 20 minutes or until a toothpick inserted in the center comes out clean.

  11. Let the cakes rest in the tin for 5 minutes before transferring them to a rack to cool completely.

For me, carrot cake comes with a good layer of frosting. Cream-cheese frosting to be precise. If there are none, I would get seriously upset. If you're looking for a good cream cheese frosting recipe, click here. It also happens to be my go-to vanilla frosting for any type of desserts.

Optional

If you want to impress people, decorate your carrot cakes with little curls of candied carrots. They look fancy but are super easy to make. There seems to be a lot of steps, below, but rest assured that the curls really are easy to make!

  1. Preheat oven to 225 degrees.

  2. Make carrot strips using a vegetable peeler. Only 1 carrot will be needed.

  3. Bring 1 cup of water and 1 cup of sugar to a boil, on high heat, and mix until all the sugar has dissolved.

  4. Add the carrot strips and reduce heat.

  5. Let simmer for about 15 minutes.

  6. Remove from heat an strain out the liquid. Let cool a few minutes.

  7. Put parchment paper on a large baking sheet and spread the carrot strips on a single layer.

  8. Bake for about 20 minutes, but do not turn off the oven.

  9. The strips will be almost dry.

  10. Working very quickly, wrap each carrot strips around a pencil to form curls and gently slide the curls off the pencil.

  11. Put the curls back in the oven and continue baking for about 10-15 minutes, until completely dry.

  12. Let the curls cool completely before decorating the cakes with them.

Variation

If you don't want to make cupcake size cakes and prefer a bigger one, just use 2 9-inch round pans. Line their bottom with parchment paper, and butter the bottom and sides of the pans. Then, bake for about 35 to 40 minutes.

My go-to vanilla frosting

Frosting should not be underestimated. If not done properly, you could ruin a whole cake. For that reason, you should find that one recipe that you really master so you have something to fall back on in case of emergency. For special occasions, I always try to find a new vanilla frosting recipe but generally, I always go back to this one. It's simple and easy to make.

Personally, I am not a fan of buttercream frosting. First, because it requires a lot of temperature control: if the butter or the room you're baking in is too cold, the cream will be too thick but if it's too hot, the cream will be curdled. Very frustrating. And the second reason why I don't like buttercream is that it requires so much butter and sugar! I mean, 2 sticks of butter and 4 cups of sugar is just too much! 

My favorite recipe only uses 1 cup of sugar and is made with cream cheese and whipping cream. Not only is cream cheese my favorite spread for my morning toasts, it is also perfect for frosting because it ads a bit of tanginess, thus providing some balance taste-wise for the cakes. The dessert will not be over sweet and the whip cream makes the frosting super light.

Vanilla frosting.JPG

My go-to vanilla frosting

INGREDIENTS

  • 1 pkg (8 oz) cream cheese, room temperature
  • 1 cup powdered sugar
  • 1 1/2 cups cold heavy whipping cream
  • 1/2 tsp vanilla extract
  • 1/2 tsp vanilla paste (optional)

DIRECTIONS

  1. Using a stand mixer with the whisk attachment, whip the heavy cream on high speed, until thick and fluffy. About 2 minutes. Be careful not to over whip! The cream should not be so thick that it looks like butter.
  2. Transfer the cream into another bowl and store it in the refrigerator.
  3. Now back to the stand mixer, whip the cream cheese and slowly add the powdered sugar, one 1/4 cup at a time. Beat at low speed. Once all the sugar is incorporated, increase speed to medium-high.
  4. Add the vanilla extract and mix. I also like to add a little bit of vanilla paste for a fuller taste and also because the tiny little vanilla seeds make the frosting look so much better! 
  5. Then, fold the whipped cream into the cream cheese mixture. This step is delicate so it should be done by hand, with a spatula.
  6. And that's it! Your frosting is ready to be piped or stored until ready to be used.

Coconut macaroon nests

This is probably the easiest and most fun dessert to make! And, it only requires very few ingredients, so how great is that? 

IMG_5423.JPG

These coconut macaroon nests can be made all year round but I like to make them around Easter so I can use those tiny Cadbury chocolate eggs as decorations! The nests are perfect for family gatherings and/ or activities. Grownups and kids alike just love preparing them as much as they enjoy eating them! 

The macaroon nests are crunchy with a chewy center, and the coconut pairs perfectly with the chocolate ganache in the middle. Coconut and chocolate are among the best food pairings there are! Alone they are great but together? They are just awesome! 

IMG_4157.JPG

Coconut macaroon nests

Makes 12 nests

INGREDIENTS

Crust

  • 2 cups of shredded unsweetened coconut
  • 3 large egg whites
  • 1/4 cup sugar
  • 1 tsp vanilla extract
  • 1/4 tsp salt

Ganache

  • 3/4 cup semisweet chocolate, chopped
  • 1/2 cup of heavy cream
  • 1/8 tsp salt

Optional

  • Mini Cadbury chocolate eggs

Directions

  1. Preheat oven to 325 degrees.
  2. Line a muffin tin with paper liners or grease the muffin tin cups.
  3. In the bowl of an electric mixer, whisk together egg whites, sugar, vanilla and salt until the mixture is frothy or foamy, 2 minutes.
  4. Add the coconut to the egg white mixture and mix until the coconut is evenly moistened. 
  5. Drop 2 tbsp of the mixture into each prepared liners or into each muffin tin cups.
  6. Delicately press the mixture down and up the sides of each cups, so it looks like a nest.
  7. Bake until golden brown, about 20 to 25 minutes.
  8. Let the coconut nests cool in the tin for about 5 minutes before transferring them to a wire rack to cool completely.
  9. While the nests are cooling, prepare the ganache.
  10. In a microwave safe bowl, add the semisweet chocolate and the cream and heat for 1 minute. 
  11. Whisk together until completely combined.
  12. Add the salt and whisk.
  13. If there a still a few chunks of chocolate left, heat for 30 seconds. Then, whisk some more until smooth.
  14. Once the nests are completely cool, fill each of them with the ganache. 
  15. Decorate each coconut nest with a few chocolate eggs.

And voilà! The cutest little coconut nests ever! 

Variations

Instead of the ganache, you can also save time and use Nutella but personally, I find Nutella a bit too sweet. If you are not a fan of the chocolate ganache, you can just serve the coconut nests with only the chocolate eggs inside. Or, replace the ganache with jam!

Enjoy and have a very happy Easter!

IMG_4158.JPG

The ultimate poundcake

Poundcakes are considerably underrated and underappreciated. They are plain enough that you can eat them at any moment of the day without being judged (yes, that means breakfast too!) and, dressed up with some berries, English cream or a coulis of some sort, they can very easily be elegant enough to impress dinner guests. Poundcakes are my go-to dessert to make when I feel like eating something sweet but do not want spend too much time or effort whipping something up. They are easy to make and amazing to eat: dense but moist, sweet but not overwhelmingly so and you can make countless variations from one single recipe just by adding stuff!

IMG_4521.JPG

I have tried and tested a great deal of recipes and found that the one bellow is what works best for me. It is pretty much an adaptation of several recipes mashed into one. I am a huge almond fan, so I usually love adding almond flavors to a lot of my desserts. But, for my poundcake, I decided to splurge a little and used almond paste instead of almond extract. Personally, I find that the almond paste gives the cake an amazing depth of flavor but some people might find it a bit overwhelming. If you are not as big an almond fan as I am, you might want to replace the almond paste with half a teaspoon of almond extract. Or, you could just do the recipe without the almond paste, in which case, use a bit more vanilla. 

IMG_4511.jpg

The Ultimate Poundcake

Makes one 5x9x3 inch cake or 12 to 14 cupcake size cakes

INGREDIENTS

  • 7 ounces of almond paste, grated

  •  1 cup granulated white sugar plus 3 tbsp, divided

  • 1/2 cup butter, room temperature, plus 1 tbsp melted

  • 4 large eggs, room temperature

  • 1 tbsp lemon zest (approx. 1 lemon)

  • 1 tsp vanilla extract

  • 1/2 cup sour cream

  • 1 1/2 cups all purpose flour

  • 1 tsp baking powder

  • 1/2 tsp salt

DIRECTIONS

  1. Preheat the oven to 325 degrees.

  2. Grease the inside of a 5x9x3 inch loaf pan with 2 tbsp of butter. I like to line my pan with a sheet of parchment paper (9 inch long and 7 to 8 inch wide, so it sticks out on both sides of the pan). It just makes it easier to pull the cake out of the pan, when it's done. If using a parchment paper, butter the inside of the paper as well. Most recipes will tell you to flour the inside of the pan, but here's a little trick: coat the pan with granulated sugar instead. Approximately 3 tbsp of it. As the cake bakes, the sugar will caramelize, adding a nice little crunch to it. 

  3. Beat the almond paste with a stand mixer, at low speed, using the paddle attachment. Slowly add the sugar, 1/4 cup at a time. Continue beating at medium-low speed until incorporated, 3 to 4 minutes.

  4. Add the butter and beat on high speed until smooth, 5 to 6 minutes.

  5. Add the eggs one at a time, beating well after each addition.

  6. Add the zest, vanilla extract and sour cream. Beat until incorporated, 2 minutes.

  7. In a separate bowl, sift together the flour, baking powder and salt.

  8. Slowly add the four mixture to the almond paste mixture, beating at medium speed, just until combined (do not overmix the batter).

  9. Pour the batter into the prepared pan and bake until golden brown, or until a toothpick inserted in the center comes out clean, 50 minutes up to an hour.

  10. Remove the cake from the oven and let it cool down. Then, carefully remove the from the pan and put it on a wire rack so it cools completely.


VARIATIONS

If you are like me and do not like to wait an hour for the cake to bake, and if you also despise cutting a cake (no 2 slices are ever the same size and cutting creates crumbs everywhere!), you could pour the batter into a cupcake pan. That way, baking only takes 20 minutes and every portions is the same size! With this recipe, you could have 12 to 14 cupcake sized poundcakes.

Poundcake.jpg

I find that this poundcake doesn't need anything else to taste good. But, if you want, you could pour a glaze on top of it once it has cooled. Since there are lemon zests in the cake, use lemon juice for the glaze. Mix 3 tsp of freshly squeezed lemon juice with 1/3 cup of powdered sugar. Add more sugar if you prefer a thicker glaze. Slowly pour the glaze all over the cake. 

Instead of a glaze, you could also make a coulis. Raspberry is a personal favorite but any fruit would do. Even better: don't prepare a coulis and just decorate the cake with fruits!

From this recipe, you could pretty much make any type of poundcake you want. Just add ingredients! You like coconut? Just add a cup of shredded coconut! You prefer chocolate chips? Great! Add as many chocolate chips as you like! The possibilities could pretty much go on and on!


Mini cheesecakes with raspberry swirls

I never get tired of eating cheesecakes. They're the best. Smooth, tart, moist and rich at the same time. Pair them with any type of fruit, coulis or sauce and you've a whole new dessert each time! My favorite cheesecake recipe is an adaptation of Martha Stewart's Easter cheesecake. That cake was a revelation, and for two reasons: no Graham crackers (not a fan of those) and the lemon zest! Ground almonds replace the crackers, providing the cakes with a lighter and subtler taste, and the zests add a little more freshness to the experience. 

I never liked making full-size cakes because I find cutting them ruins the whole look of the dessert and I am way too impatient to wait for the cake to bake. It sometimes takes up to an hour! Cupcake-size cakes take much less time to bake and each serving is pretty! It's a win-win situation in my opinion.

Cheesecake.jpg

Mini cheesecakes with raspberry swirls

Makes approx. 20 mini cakes

Ingredients

Crust

  • 1 cup ground blanched almonds

Filling

  • 4 250g cream cheese packages, room temperature

  • 1 cup sugar

  • 1 tbsp lemon zest (approx. 1 lemon)

  • 1/2 cup heavy cream

  • 1 tsp vanilla extract

  • 4 large eggs

Raspberry sauce

  • 8 oz fresh or frozen raspberries

  • 4 tbsp granulated sugar

Directions

  1. Preheat the oven to 325 degrees.

  2. Line muffin tin with paper liners and pour 1 tablespoon ground almonds in each liner. Spread evenly.

  3. Add raspberries and 4 tablespoons of sugar in a food processor and pulse until well puréed, about 1 minute.

  4. Press the mixture through a fine mesh strainer. Set aside.

  5. In the bowl of an electric mixer fitted with the paddle attachment, beat on medium low speed the cream cheese, heavy cream and sugar until smooth, about 2 minutes.

  6. Add eggs one at a time and beat until incorporated.

  7. Add zest and vanilla and beat until incorporated.

  8. Fill each prepared liner about 2/3 full with the batter.

  9. Drop about 5 small dots of raspberry sauce over each cake (about 3/4 tsp total over each cake).

  10. Using a toothpick, swirl raspberry sauce with cheesecake mixture. Don't over do it; a few quick swirls will do the trick.

  11. Bake for about 18 to 20 minutes or until the center of the cheesecakes don't jiggle when the pan is tapped.

  12. Remove from the oven and set on a rack to cool completely, then chill in the refrigerator for about 3 hours until set.

  13. If you have leftover raspberry sauce, don't throw it away! Save it in a sealed container so that you can serve it later with the cheesecakes.

 Variations

Not a fan of the ground almond crust or allergic to nuts? Not a problems! Just use the traditional graham cracker crust instead (1.5 cups of graham cracker crumbs mixed with 1/3 cup of sugar and 6 tbsp melted butter. Optional: 1/8 tsp cinnamon). I looked for alternatives because I never was a fan of graham crackers, but I do understand its appeal.

If you're looking for something different, replace the crust with Oreo cookie wafers! They add a chocolaty taste to the cakes!

If you're not a raspberry fan, do not make the swirls and bake the cakes as is. The cakes are good as they are and can be enjoyed as such. You can also pair them with any type of sauce (chocolate, caramel, condensed milk, ...), any type of coulis (strawberry, blueberry, passion fruit, ...) or any fruit of your choice! The possibilities are endless and you cannot go wrong, no matter what you go for!